Do you love easy, delicious recipes? Join the Food On Paper family and never miss a recipe
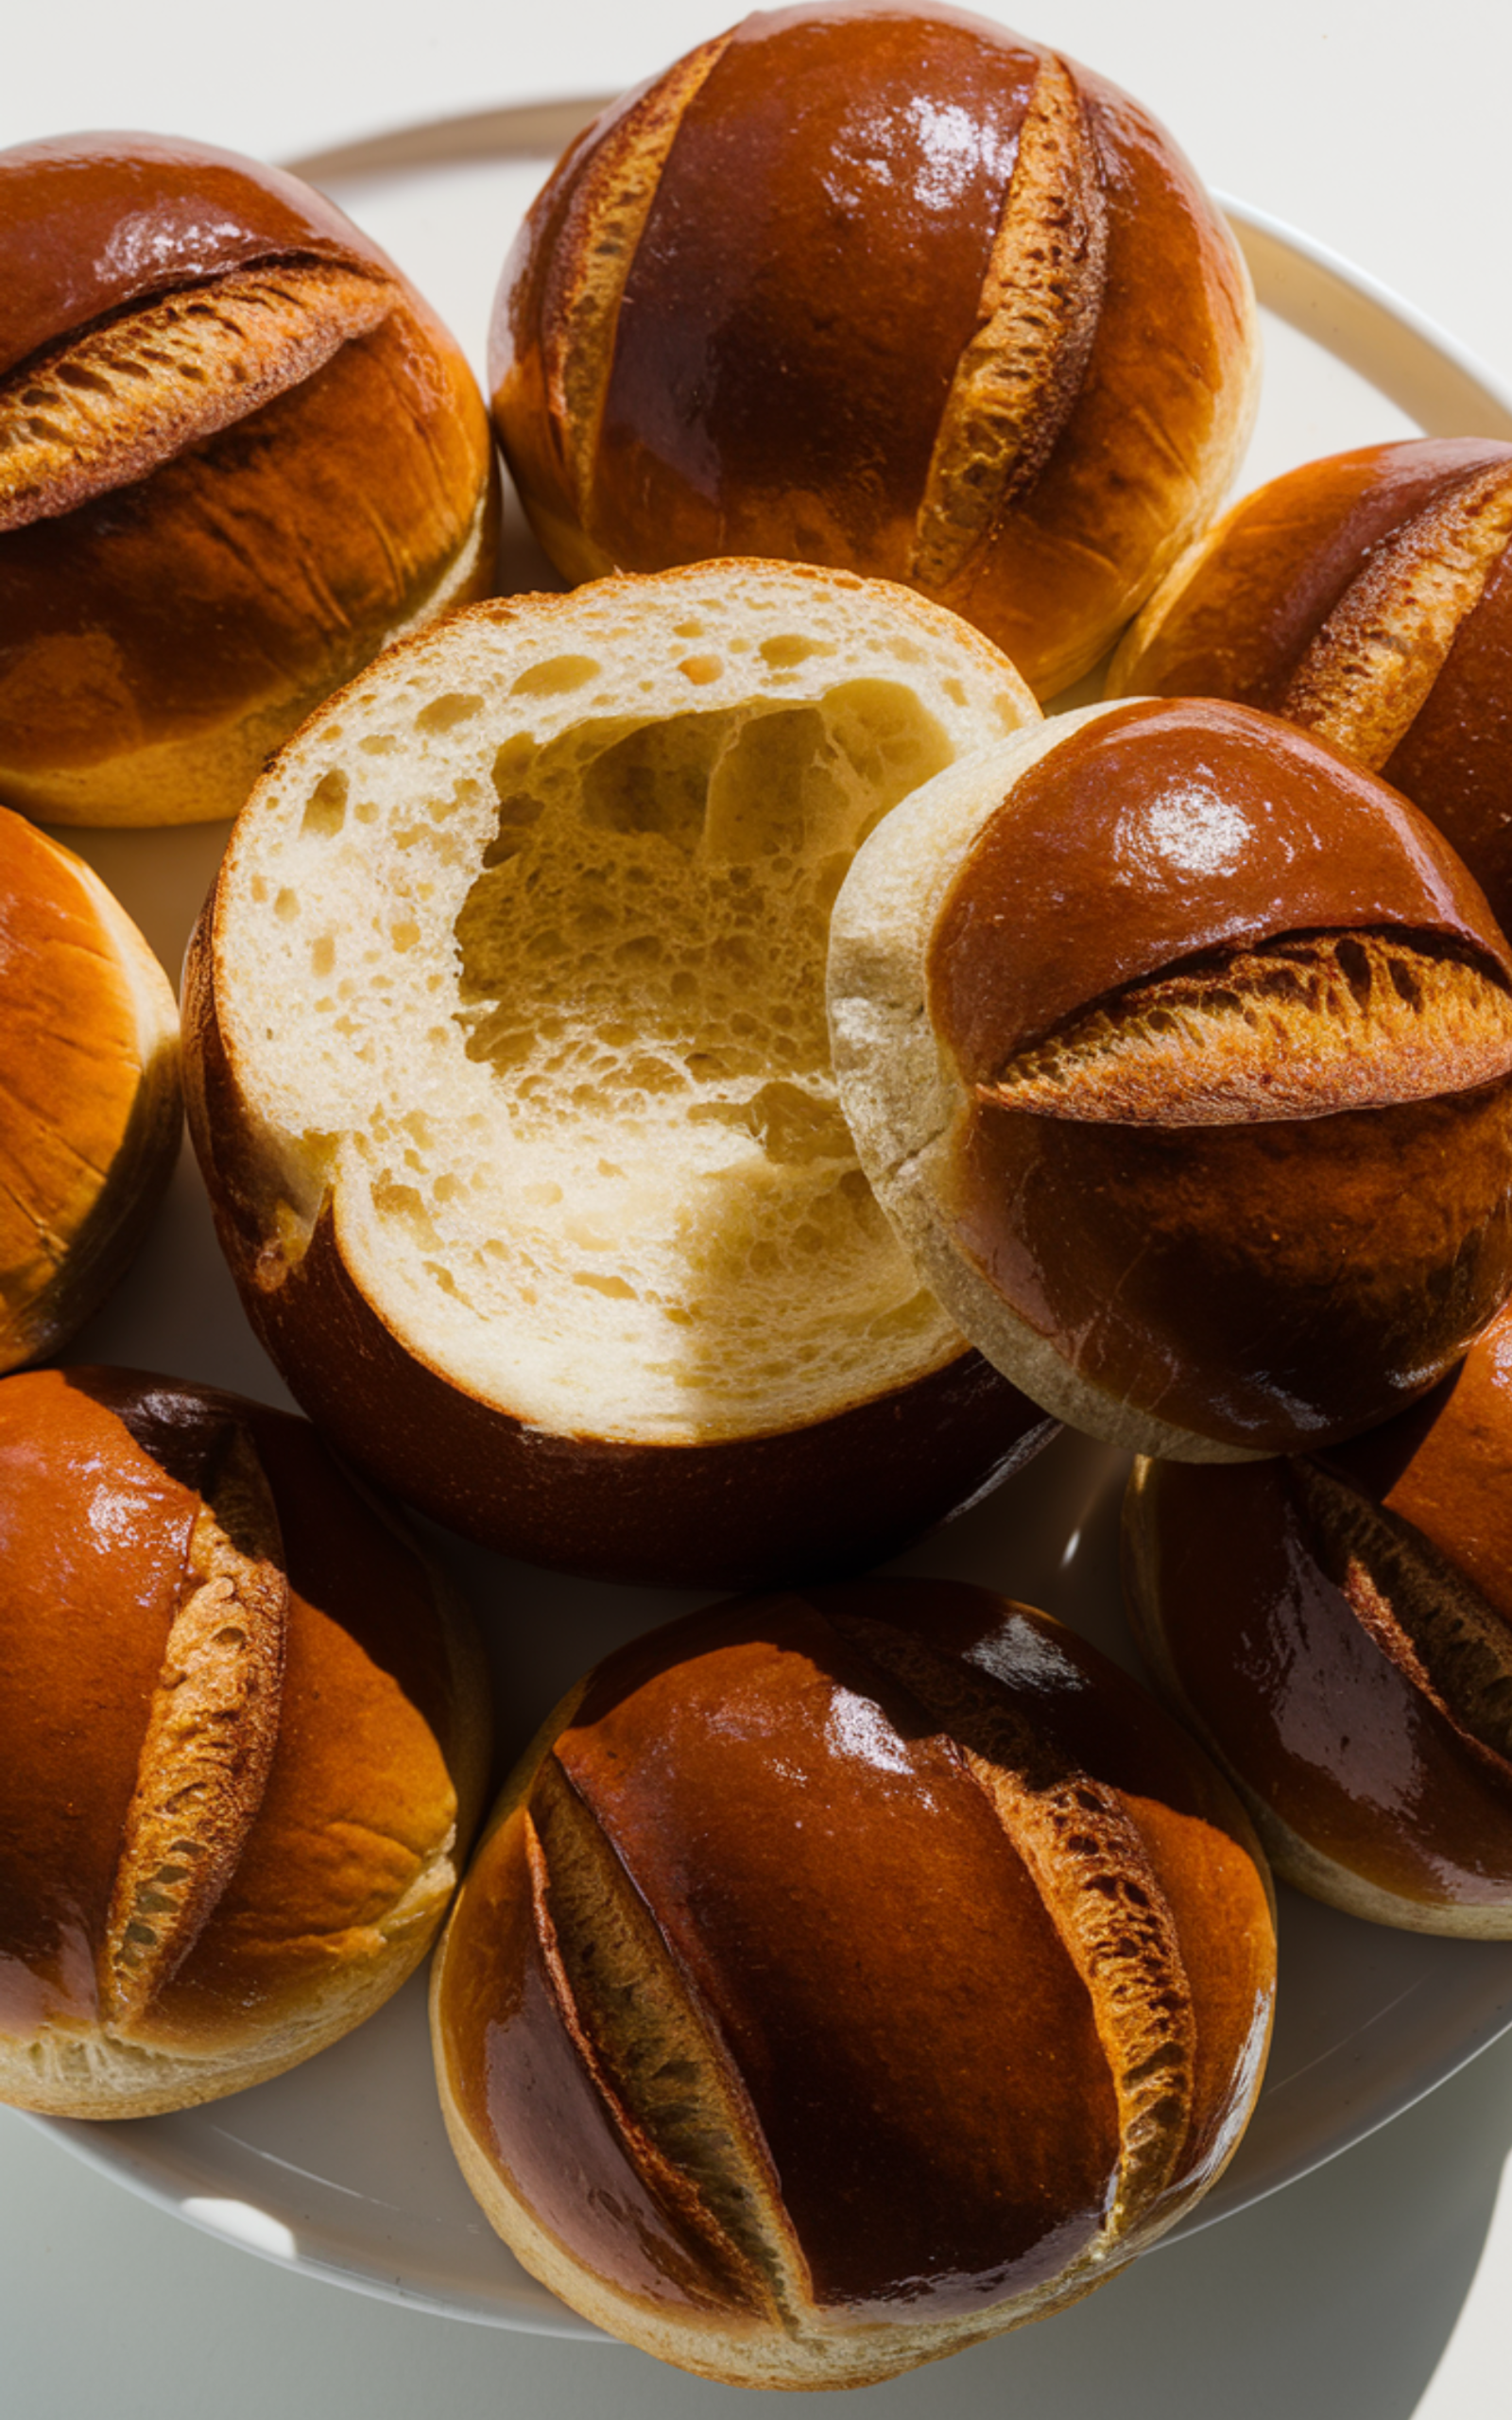
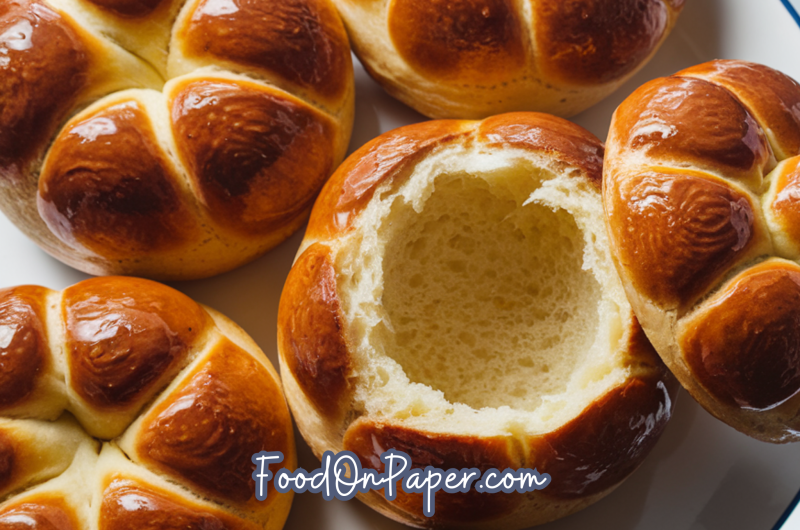
homemade bread bowls
The first time I made Homemade Bread Bowls for a cozy Sunday dinner, my kids thought it was the coolest thing ever to eat soup out of bread. Now, Homemade Bread Bowls are our go-to for chilly nights. I love serving Homemade Bread Bowls with creamy tomato soup, crisp Caesar salad, and a Vanilla Cream Cold Brew for the perfect cozy family meal.
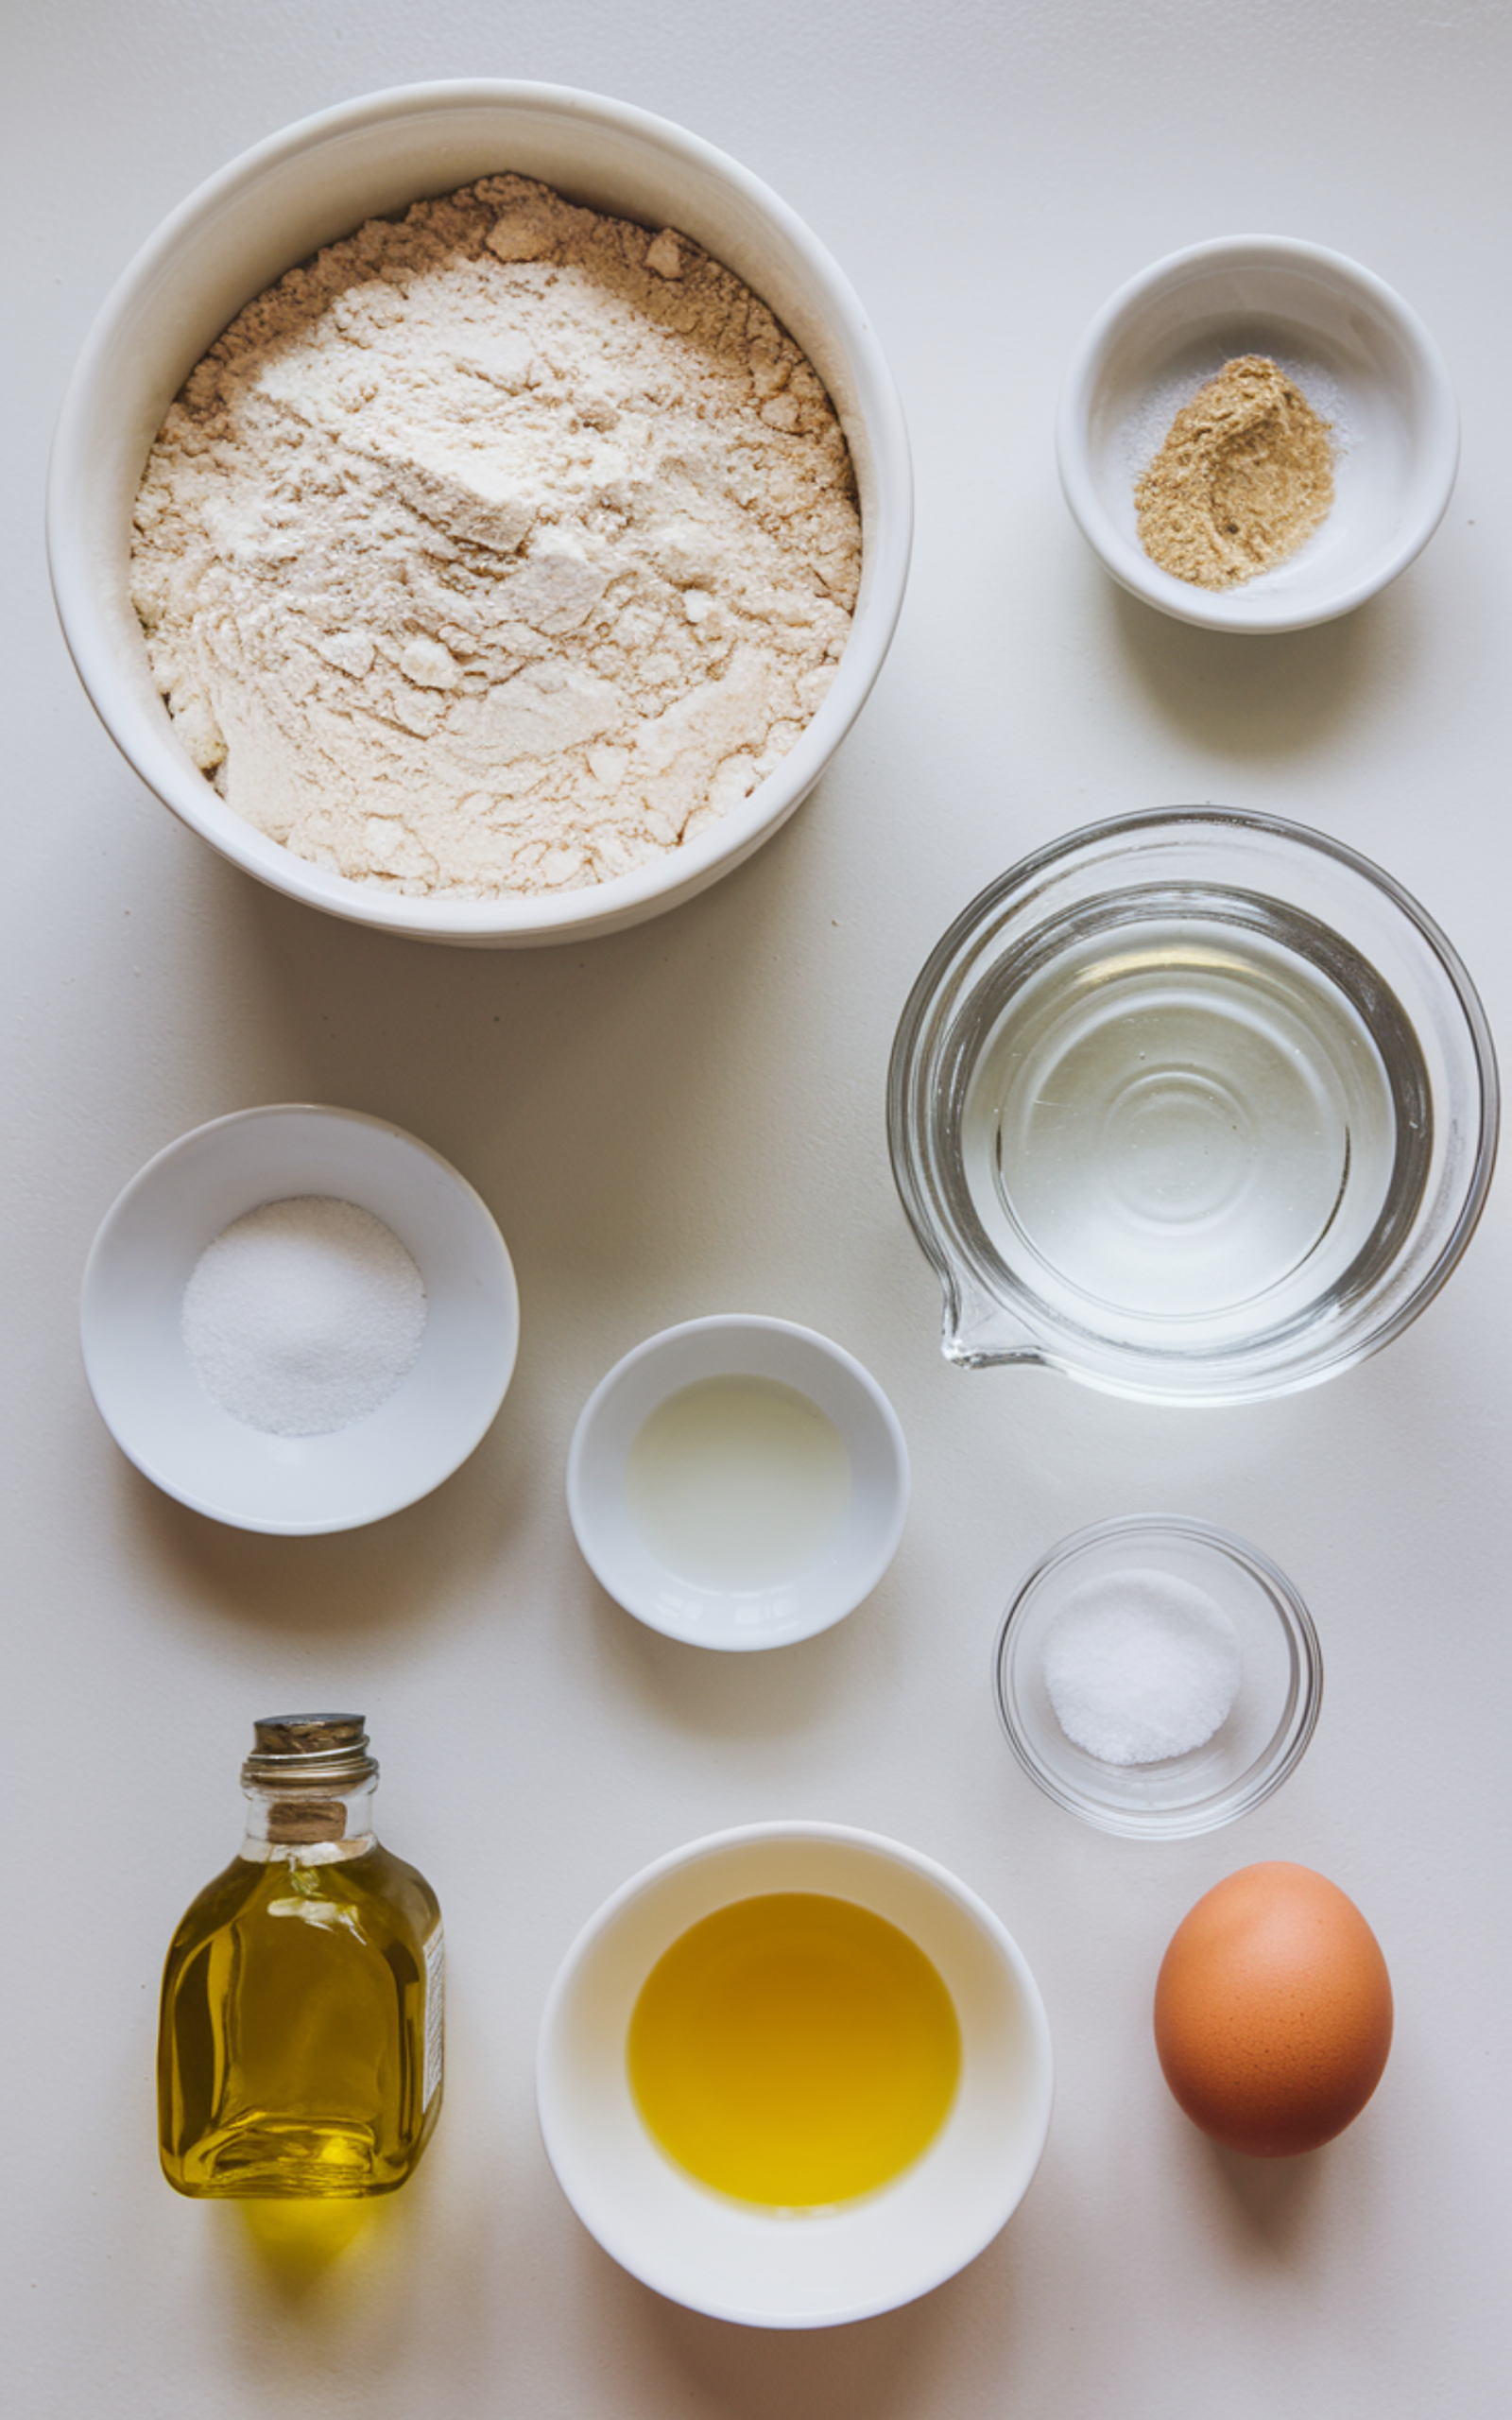
Ingredients
- Bread flour
- Active dry yeast
- Granulated sugar
- Salt
- Warm water
- Olive oil
- Egg
Ingredient Notes
- Bread Flour: Provides the high protein content needed for strong gluten development and chewy structure, which is essential for sturdy homemade bread bowls that can hold soup without collapsing. All-purpose flour can be used, but the bowls may be slightly softer.
- Active Dry Yeast: Helps the dough rise and creates light, airy interiors. Instant yeast can be substituted in equal amounts, but it can be mixed directly with the flour instead of proofing separately.
- Granulated Sugar: Feeds the yeast and supports proper fermentation while adding a subtle balance to the flavor. Honey can be used as a natural alternative if preferred.
- Salt: Enhances flavor and controls yeast activity. Do not skip or reduce significantly, as it plays a critical role in gluten strength and overall structure.
- Warm Water: Activates the yeast and hydrates the flour. The water should feel warm but not hot to the touch, typically around 105–110°F, to avoid killing the yeast.
- Olive Oil: Adds tenderness and slight richness to the crumb while helping improve elasticity. Neutral oils such as vegetable or avocado oil also work well.
- Egg: Used for the egg wash to create a golden, glossy crust and a slightly firmer exterior, which helps homemade bread bowls maintain their shape when filled.
How to Make Homemade Bread Bowls?
Step 1:
In a large mixing bowl, combine warm water, granulated sugar, and active dry yeast. Stir gently and allow the mixture to sit for about 5 to 10 minutes until it becomes foamy and bubbly. This step confirms that the yeast is active. If no foam forms, the yeast may have expired, or the water may have been too hot or too cool, and you should start again before proceeding to ensure properly risen homemade bread bowls.
Step 2:
Add bread flour, salt, and olive oil to the yeast mixture. Stir until a shaggy dough forms. Once combined, transfer the dough onto a lightly floured surface and knead for about 8 to 10 minutes until smooth and elastic. The dough should be slightly tacky but not sticky. Proper kneading develops gluten, which is essential for strong homemade bread bowls that can hold thick soups like chowder or chili without leaking.
Step 3:
Place the kneaded dough into a lightly greased bowl and cover it with a clean kitchen towel or plastic wrap. Allow it to rise in a warm, draft-free area for about 60 to 90 minutes, or until doubled in size. Under-proofing will result in dense bread bowls, while over-proofing can weaken the structure. The dough is ready when it springs back slowly after being gently pressed with a finger.
Step 4:
Punch down the risen dough gently to release excess air. Divide the dough into equal portions, typically four to six pieces, depending on your preferred size. Shape each piece into a tight, smooth ball by pulling the edges underneath and rolling gently on the countertop. Proper shaping creates surface tension, which helps homemade bread bowls rise rather than spread outward during baking.
Step 5:
Place the shaped dough balls on a parchment-lined baking sheet, leaving enough space between each one for expansion. Cover loosely and allow them to rise again for 30 to 45 minutes until puffy but not overly soft. This second rise improves texture and ensures the finished homemade bread bowls have a light interior and crisp crust.
Step 6:
Preheat your oven to 400°F. Whisk the egg with a small amount of water and brush it gently over each dough ball to create an even egg wash. This promotes a deep golden crust and adds structural support. For an even sturdier crust, you can place a shallow pan of water on the lower oven rack to create steam, which enhances crust formation.
Step 7:
Bake the bread bowls for 20 to 25 minutes until deeply golden brown and firm to the touch. The bottoms should sound hollow when tapped. Avoid underbaking, as slightly soft crusts may collapse once filled. Transfer the baked homemade bread bowls to a wire rack and allow them to cool completely before hollowing.
Step 8:
Once cooled, use a serrated knife to cut a circular lid from the top of each bowl. Carefully remove the interior bread, leaving about a half-inch thick wall around the edges and bottom. Do not scrape too thin, as this can cause leaks. Your homemade bread bowls are now ready to be filled with your favorite soups, stews, or dips.
Kitchen Equipment Needed
- Large mixing bowl
- Measuring cups
- Wooden spoon or dough scraper
- Clean work surface
- Baking sheet
- Parchment paper
- Pastry brush
- Serrated knife
- Wire cooling rack
Pro Tips for Best Results
For bakery-quality homemade bread bowls, focus on gluten development and proper proofing times. Knead thoroughly until the dough passes the windowpane test, which ensures strength and elasticity. Use bread flour whenever possible for superior structure. Avoid adding too much flour during kneading, as dry dough produces dense bread. Bake until fully golden and firm, even if it requires a few extra minutes.
Storage, Freezing, and Reheating
Homemade bread bowls can be stored at room temperature in an airtight container for up to two days. For longer storage, wrap each bowl tightly in plastic wrap and freeze for up to three months. To reheat, thaw at room temperature and warm in a 350°F oven for about 8 to 10 minutes to refresh the crust. Avoid microwaving, as it softens the exterior and compromises the structure. If already hollowed, store separately from moist fillings to prevent sogginess.
Recipe Variations and Substitutions
You can customize homemade bread bowls by incorporating whole wheat flour for a heartier flavor or substituting part of the bread flour with rye flour for a rustic twist. For dairy-free preparation, this recipe is naturally dairy-free as written. Add herbs such as rosemary or thyme directly into the dough for aromatic flavor. A sprinkle of shredded cheddar on top before baking creates a cheesy crust ideal for serving with broccoli soup. For smaller gatherings, shape mini bread bowls for individual servings.
FAQ
Can I make homemade bread bowls ahead of time?
Yes, homemade bread bowls can be baked one day in advance and stored in an airtight container at room temperature. Reheat briefly in the oven before serving to restore crispness.
What soups work best in bread bowls?
Thick soups such as clam chowder, chili, broccoli cheddar, creamy tomato, and potato soup work best. Thin broths may soak through more quickly.
Why did my bread bowls turn out dense?
Dense homemade bread bowls are usually caused by insufficient kneading, expired yeast, or under-proofing. Ensure proper gluten development and adequate rise time.
Can I use all-purpose flour instead of bread flour?
Yes, but the texture may be slightly softer. Bread flour is preferred because it provides a stronger structure for holding fillings.
How thick should the walls be when hollowing?
Leave about half an inch around the sides and bottom. Thinner walls increase the risk of leaks once filled.
Can I freeze homemade bread bowls?
Absolutely. Wrap tightly and freeze for up to three months. Thaw at room temperature and refresh in the oven before using.
How do I keep bread bowls from getting soggy?
Allow the bowls to cool fully before cutting, avoid thin walls, and serve immediately after filling. For extra protection, you can lightly toast the interior before adding soup.
homemade bread bowls
Course: DinnerCuisine: AmericanDifficulty: MediumServings
6
servingsPrep time
20
minutesCooking time
25
minutesCalories
320
kcalTotal time
45
minutesThese homemade bread bowls are crusty on the outside and soft inside, perfect for serving hearty soups and stews. Made with simple pantry ingredients, they are sturdy, flavorful, and ideal for comfort food meals.
Ingredients
Bread flour
Active dry yeast
Granulated sugar
Salt
Warm water
Olive oil
Egg
Directions
- In a large mixing bowl, combine warm water, granulated sugar, and active dry yeast. Stir gently and allow the mixture to sit for about 5 to 10 minutes until it becomes foamy and bubbly. This step confirms that the yeast is active. If no foam forms, the yeast may have expired, or the water may have been too hot or too cool, and you should start again before proceeding to ensure properly risen homemade bread bowls.
- Add bread flour, salt, and olive oil to the yeast mixture. Stir until a shaggy dough forms. Once combined, transfer the dough onto a lightly floured surface and knead for about 8 to 10 minutes until smooth and elastic. The dough should be slightly tacky but not sticky. Proper kneading develops gluten, which is essential for strong homemade bread bowls that can hold thick soups like chowder or chili without leaking.
- Place the kneaded dough into a lightly greased bowl and cover it with a clean kitchen towel or plastic wrap. Allow it to rise in a warm, draft-free area for about 60 to 90 minutes, or until doubled in size. Under-proofing will result in dense bread bowls, while over-proofing can weaken the structure. The dough is ready when it springs back slowly after being gently pressed with a finger.
- Punch down the risen dough gently to release excess air. Divide the dough into equal portions, typically four to six pieces, depending on your preferred size. Shape each piece into a tight, smooth ball by pulling the edges underneath and rolling gently on the countertop. Proper shaping creates surface tension, which helps homemade bread bowls rise rather than spread outward during baking.
- Place the shaped dough balls on a parchment-lined baking sheet, leaving enough space between each one for expansion. Cover loosely and allow them to rise again for 30 to 45 minutes until puffy but not overly soft. This second rise improves texture and ensures the finished homemade bread bowls have a light interior and crisp crust.
- Preheat your oven to 400°F. Whisk the egg with a small amount of water and brush it gently over each dough ball to create an even egg wash. This promotes a deep golden crust and adds structural support. For an even sturdier crust, you can place a shallow pan of water on the lower oven rack to create steam, which enhances crust formation.
- Bake the bread bowls for 20 to 25 minutes until deeply golden brown and firm to the touch. The bottoms should sound hollow when tapped. Avoid underbaking, as slightly soft crusts may collapse once filled. Transfer the baked homemade bread bowls to a wire rack and allow them to cool completely before hollowing.
- Once cooled, use a serrated knife to cut a circular lid from the top of each bowl. Carefully remove the interior bread, leaving about a half-inch thick wall around the edges and bottom. Do not scrape too thin, as this can cause leaks. Your homemade bread bowls are now ready to be filled with your favorite soups, stews, or dips.