Do you love easy, delicious recipes? Join the Food On Paper family and never miss a recipe
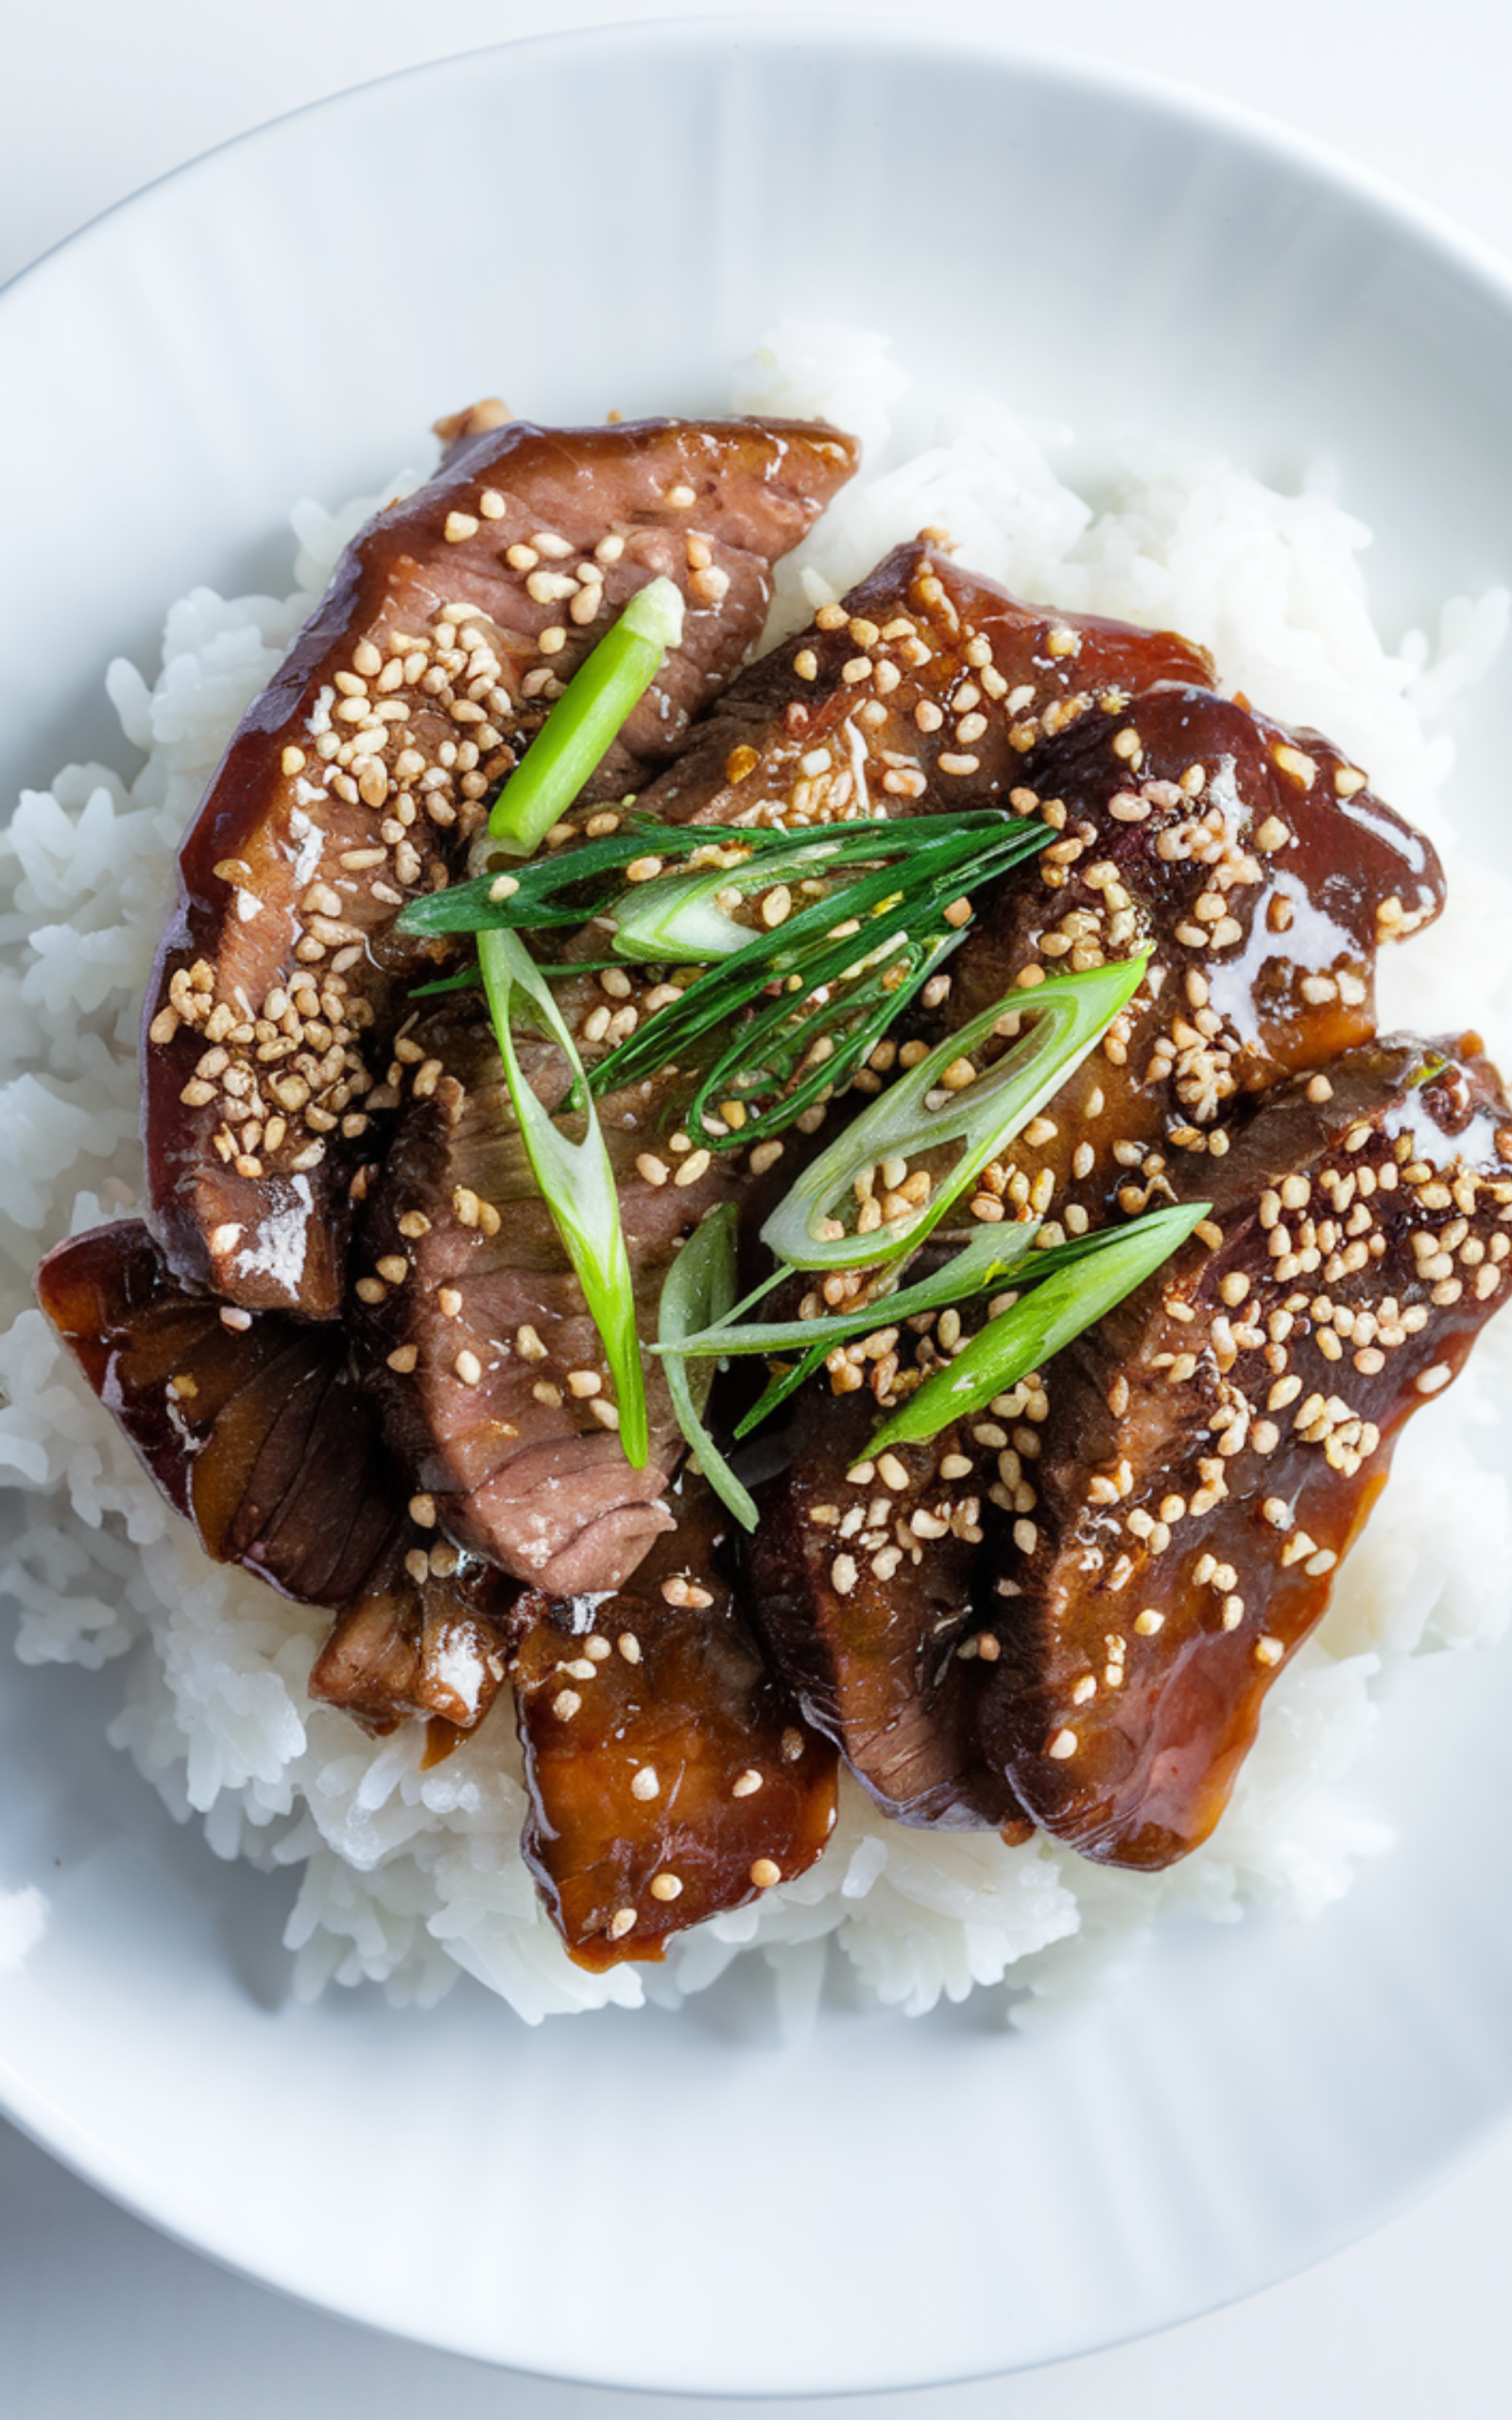
Mongolian Beef
I always keep this Mongolian Beef recipe in my weeknight rotation because my kids absolutely devour it, and it’s a lifesaver when I need a quick, satisfying dinner. Making Mongolian Beef reminds me of cozy nights with takeout vibes at home, and I love pairing it with muffin tins, a simple side of roasted garlic broccoli, or even crispy sesame snap peas for an easy, balanced meal. Every time I serve Mongolian Beef, it feels like a little win in my busy week.
Ingredients
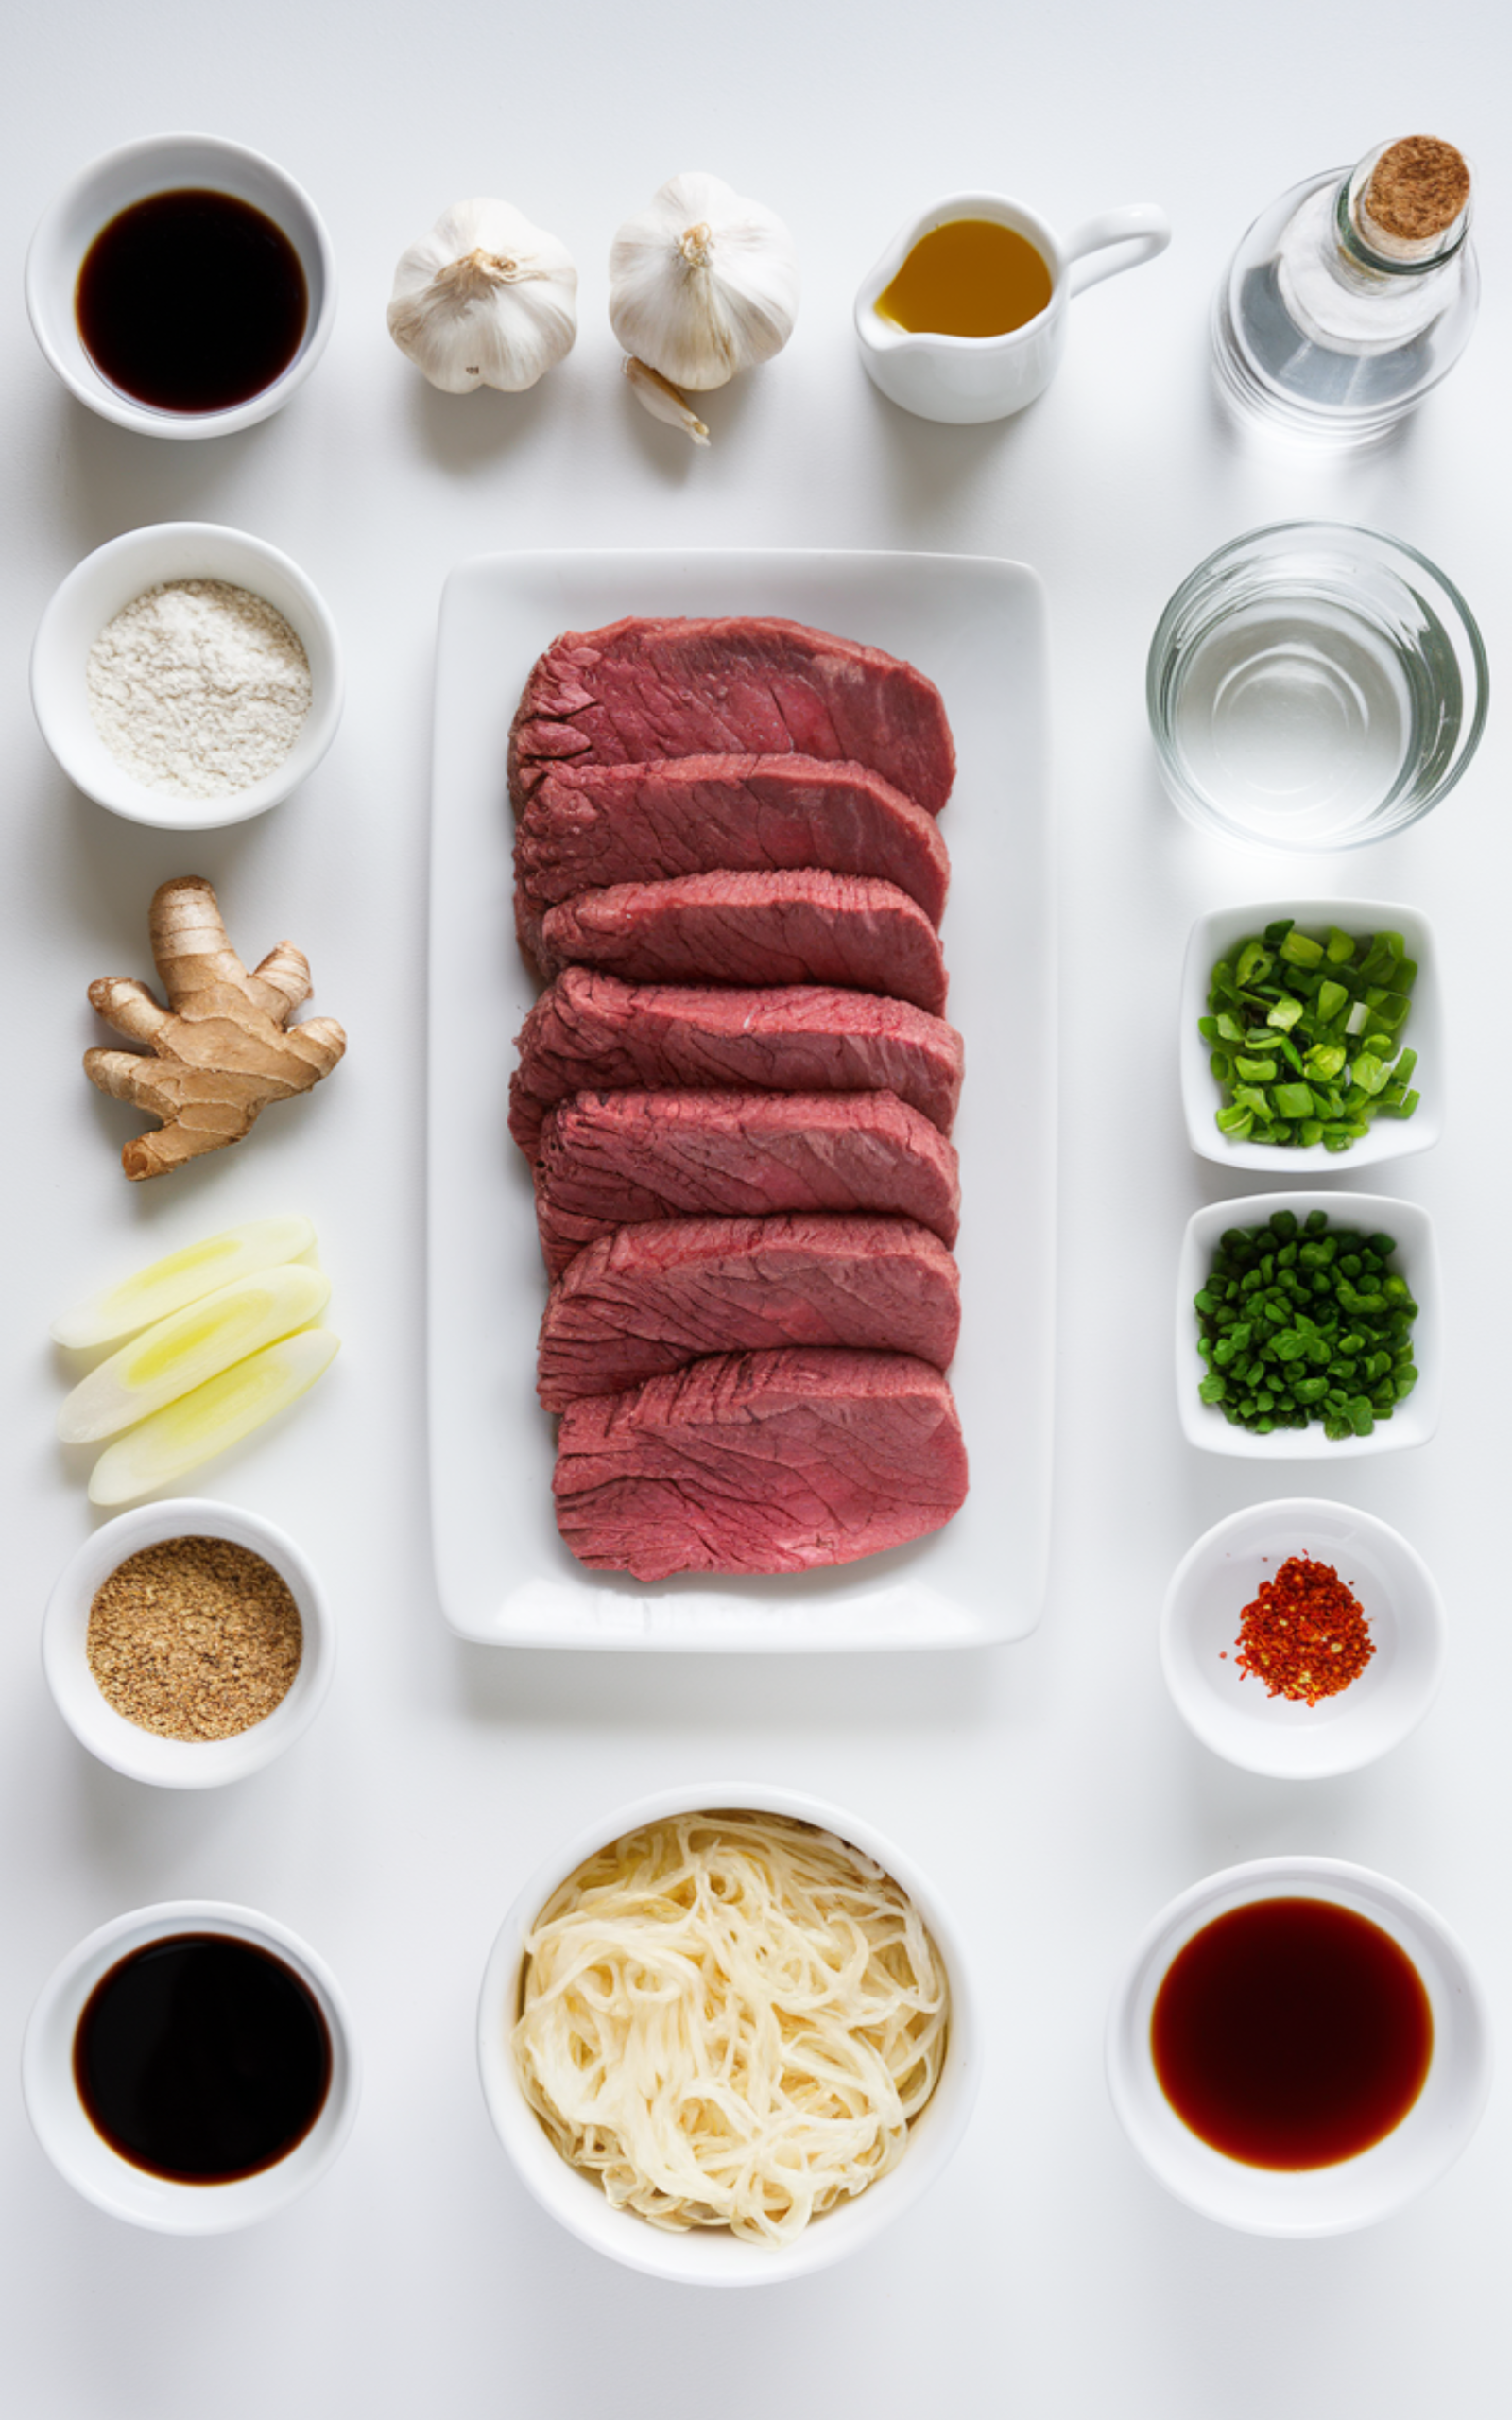
- Beef sirloin
- Cornstarch
- Vegetable oil
- Garlic
- Ginger
- Green onions
- Soy sauce
- Brown sugar
- Water
- Red pepper flakes
- Sesame oil
- Rice or noodles
Ingredient Notes
- Beef Sirloin: Choose well-marbled beef for tenderness; flank steak works as a substitute.
- Cornstarch: Provides a light coating to sear the beef; can substitute with arrowroot powder.
- Vegetable Oil: High smoke point oil for stir-frying; can use canola or avocado oil.
- Garlic: Adds aromatic depth; fresh is best, pre-minced can be used in a pinch.
- Ginger: Provides warmth and subtle spice; ground ginger may be used, but fresh is preferred.
- Green Onions: Adds freshness and garnish; scallions are interchangeable.
- Soy Sauce: Base of the savory sauce; low-sodium option available for dietary needs.
- Brown Sugar: Balances the saltiness with sweetness; coconut sugar works as a substitute.
- Water: Creates the sauce consistency; beef broth can enhance flavor.
- Red Pepper Flakes: Adds heat; adjust quantity to taste or omit for mild flavor.
- Sesame Oil: Finishing oil for nutty aroma; avoid cooking at high heat to preserve flavor.
- Rice or Noodles: Traditional accompaniment; jasmine rice is preferred, but brown rice or lo mein noodles work.
How to Make Mongolian Beef?
Step 1: Prepare the beef
Slice the beef sirloin thinly against the grain for tenderness, then coat evenly in cornstarch, ensuring all surfaces are lightly covered to achieve a crispy exterior when seared.
Step 2: Heat the pan
Heat a large skillet or wok over medium-high heat until hot, add vegetable oil, and swirl to coat; ensure the oil is shimmering but not smoking to prevent burning.
Step 3: Cook the beef
Add the coated beef in batches to avoid overcrowding; sear for 2–3 minutes per side until browned and crispy, then remove and set aside to maintain texture and prevent steaming.
Step 4: Prepare aromatics
Reduce the heat to medium, add garlic and ginger to the same pan, and sauté for 30–45 seconds until fragrant, taking care not to burn them as this can cause bitterness.
Step 5: Make the sauce
Add soy sauce, brown sugar, water, and red pepper flakes to the pan; stir to dissolve the sugar and allow the sauce to thicken slightly, about 2–3 minutes, adjusting heat to maintain a gentle simmer.
Step 6: Combine beef and sauce
Return the seared beef to the pan, tossing quickly to coat in the sauce; cook for 1–2 minutes to allow flavors to meld without overcooking the meat.
Step 7: Add green onions and finish
Stir in sliced green onions and a drizzle of sesame oil just before serving; this preserves freshness and aromatic quality while enhancing the overall flavor profile.
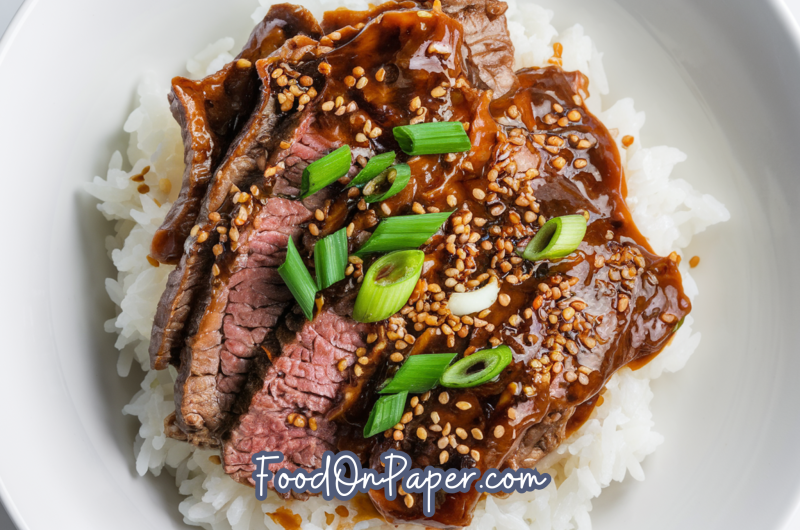
Step 8: Serve
Plate the Mongolian Beef over steamed rice or noodles; garnish with extra green onions or sesame seeds if desired for presentation and added texture.
Kitchen Equipment Needed
- Wok or large skillet
- Cutting board
- Chef’s knife
- Mixing bowls
- Measuring spoons
- Spatula or tongs
- Serving plate or bowl
Pro Tips for Best Results
Use high heat for searing beef in small batches to achieve a caramelized crust without steaming. Pat the beef dry before the cornstarch coating to maximize crispiness. Fresh ginger and garlic elevate flavor significantly. Stir the sauce continuously when combining to prevent sugar from burning. Avoid overcooking to maintain a tender, juicy texture.
Storage, Freezing, and Reheating
Store Mongolian Beef in an airtight container in the fridge for up to 3 days. Freeze in portioned containers for up to 2 months. Reheat gently in a skillet over medium heat to preserve sauce consistency and beef tenderness, adding a splash of water if the sauce thickens too much. Avoid microwaving at high power to prevent drying out.
Recipe Variations and Substitutions
For a lighter version, swap beef with chicken or tofu. Add vegetables such as bell peppers, broccoli, or snap peas for more color and nutrition. Use tamari or coconut aminos for gluten-free versions. Adjust sweetness or spice by modifying brown sugar and red pepper flakes. US households often prefer serving with jasmine rice, but lo mein noodles or cauliflower rice provide excellent alternatives.
FAQ
What cut of beef is best for Mongolian Beef?
Thinly sliced sirloin is ideal for tenderness and flavor; flank steak or ribeye also works if sliced thinly against the grain.
Can I make Mongolian Beef ahead of time?
Yes, you can prep the beef and sauce separately and combine just before serving. Avoid fully cooking in advance to maintain crispiness.
How do I make Mongolian Beef less sweet?
Reduce brown sugar by half and taste the sauce; adjust gradually to your preference.
Can I freeze Mongolian Beef?
Yes, freeze in airtight containers for up to 2 months. Reheat gently to preserve texture.
What should I serve with Mongolian Beef?
Steamed jasmine rice, brown rice, or lo mein noodles complement the dish well. Vegetables on the side are optional, but add color and nutrition.
Is Mongolian Beef spicy?
Traditionally, it is mildly spicy; adjust red pepper flakes according to preference or omit for a mild version.
Can I make Mongolian Beef gluten-free?
Yes, use tamari or coconut aminos instead of soy sauce and ensure cornstarch is gluten-free.
mongolian beef
Course: DinnerCuisine: ChineseDifficulty: MediumServings
4
servingsPrep time
15
minutesCooking time
15
minutesCalories
450
kcalTotal time
30
minutesMongolian Beef features tender, thinly sliced beef in a sweet and savory sauce with garlic, ginger, and green onions. Serve over rice or noodles for a classic Chinese-American favorite.
Ingredients
Beef sirloin
Cornstarch
Vegetable oil
Garlic
Ginger
Green onions
Soy sauce
Brown sugar
Water
Red pepper flakes
Sesame oil
Rice or noodles
Directions
- Slice the beef sirloin thinly against the grain for tenderness, then coat evenly in cornstarch, ensuring all surfaces are lightly covered to achieve a crispy exterior when seared.
- Heat a large skillet or wok over medium-high heat until hot, add vegetable oil, and swirl to coat; ensure the oil is shimmering but not smoking to prevent burning.
- Add the coated beef in batches to avoid overcrowding; sear for 2–3 minutes per side until browned and crispy, then remove and set aside to maintain texture and prevent steaming.
- Reduce the heat to medium, add garlic and ginger to the same pan, and sauté for 30–45 seconds until fragrant, taking care not to burn them as this can cause bitterness.
- Add soy sauce, brown sugar, water, and red pepper flakes to the pan; stir to dissolve the sugar and allow the sauce to thicken slightly, about 2–3 minutes, adjusting heat to maintain a gentle simmer.
- Return the seared beef to the pan, tossing quickly to coat in the sauce; cook for 1–2 minutes to allow flavors to meld without overcooking the meat.
- Stir in sliced green onions and a drizzle of sesame oil just before serving; this preserves freshness and aromatic quality while enhancing the overall flavor profile.
- Plate the Mongolian Beef over steamed rice or noodles; garnish with extra green onions or sesame seeds if desired for presentation and added texture.