Do you love easy, delicious recipes? Join the Food On Paper family and never miss a recipe
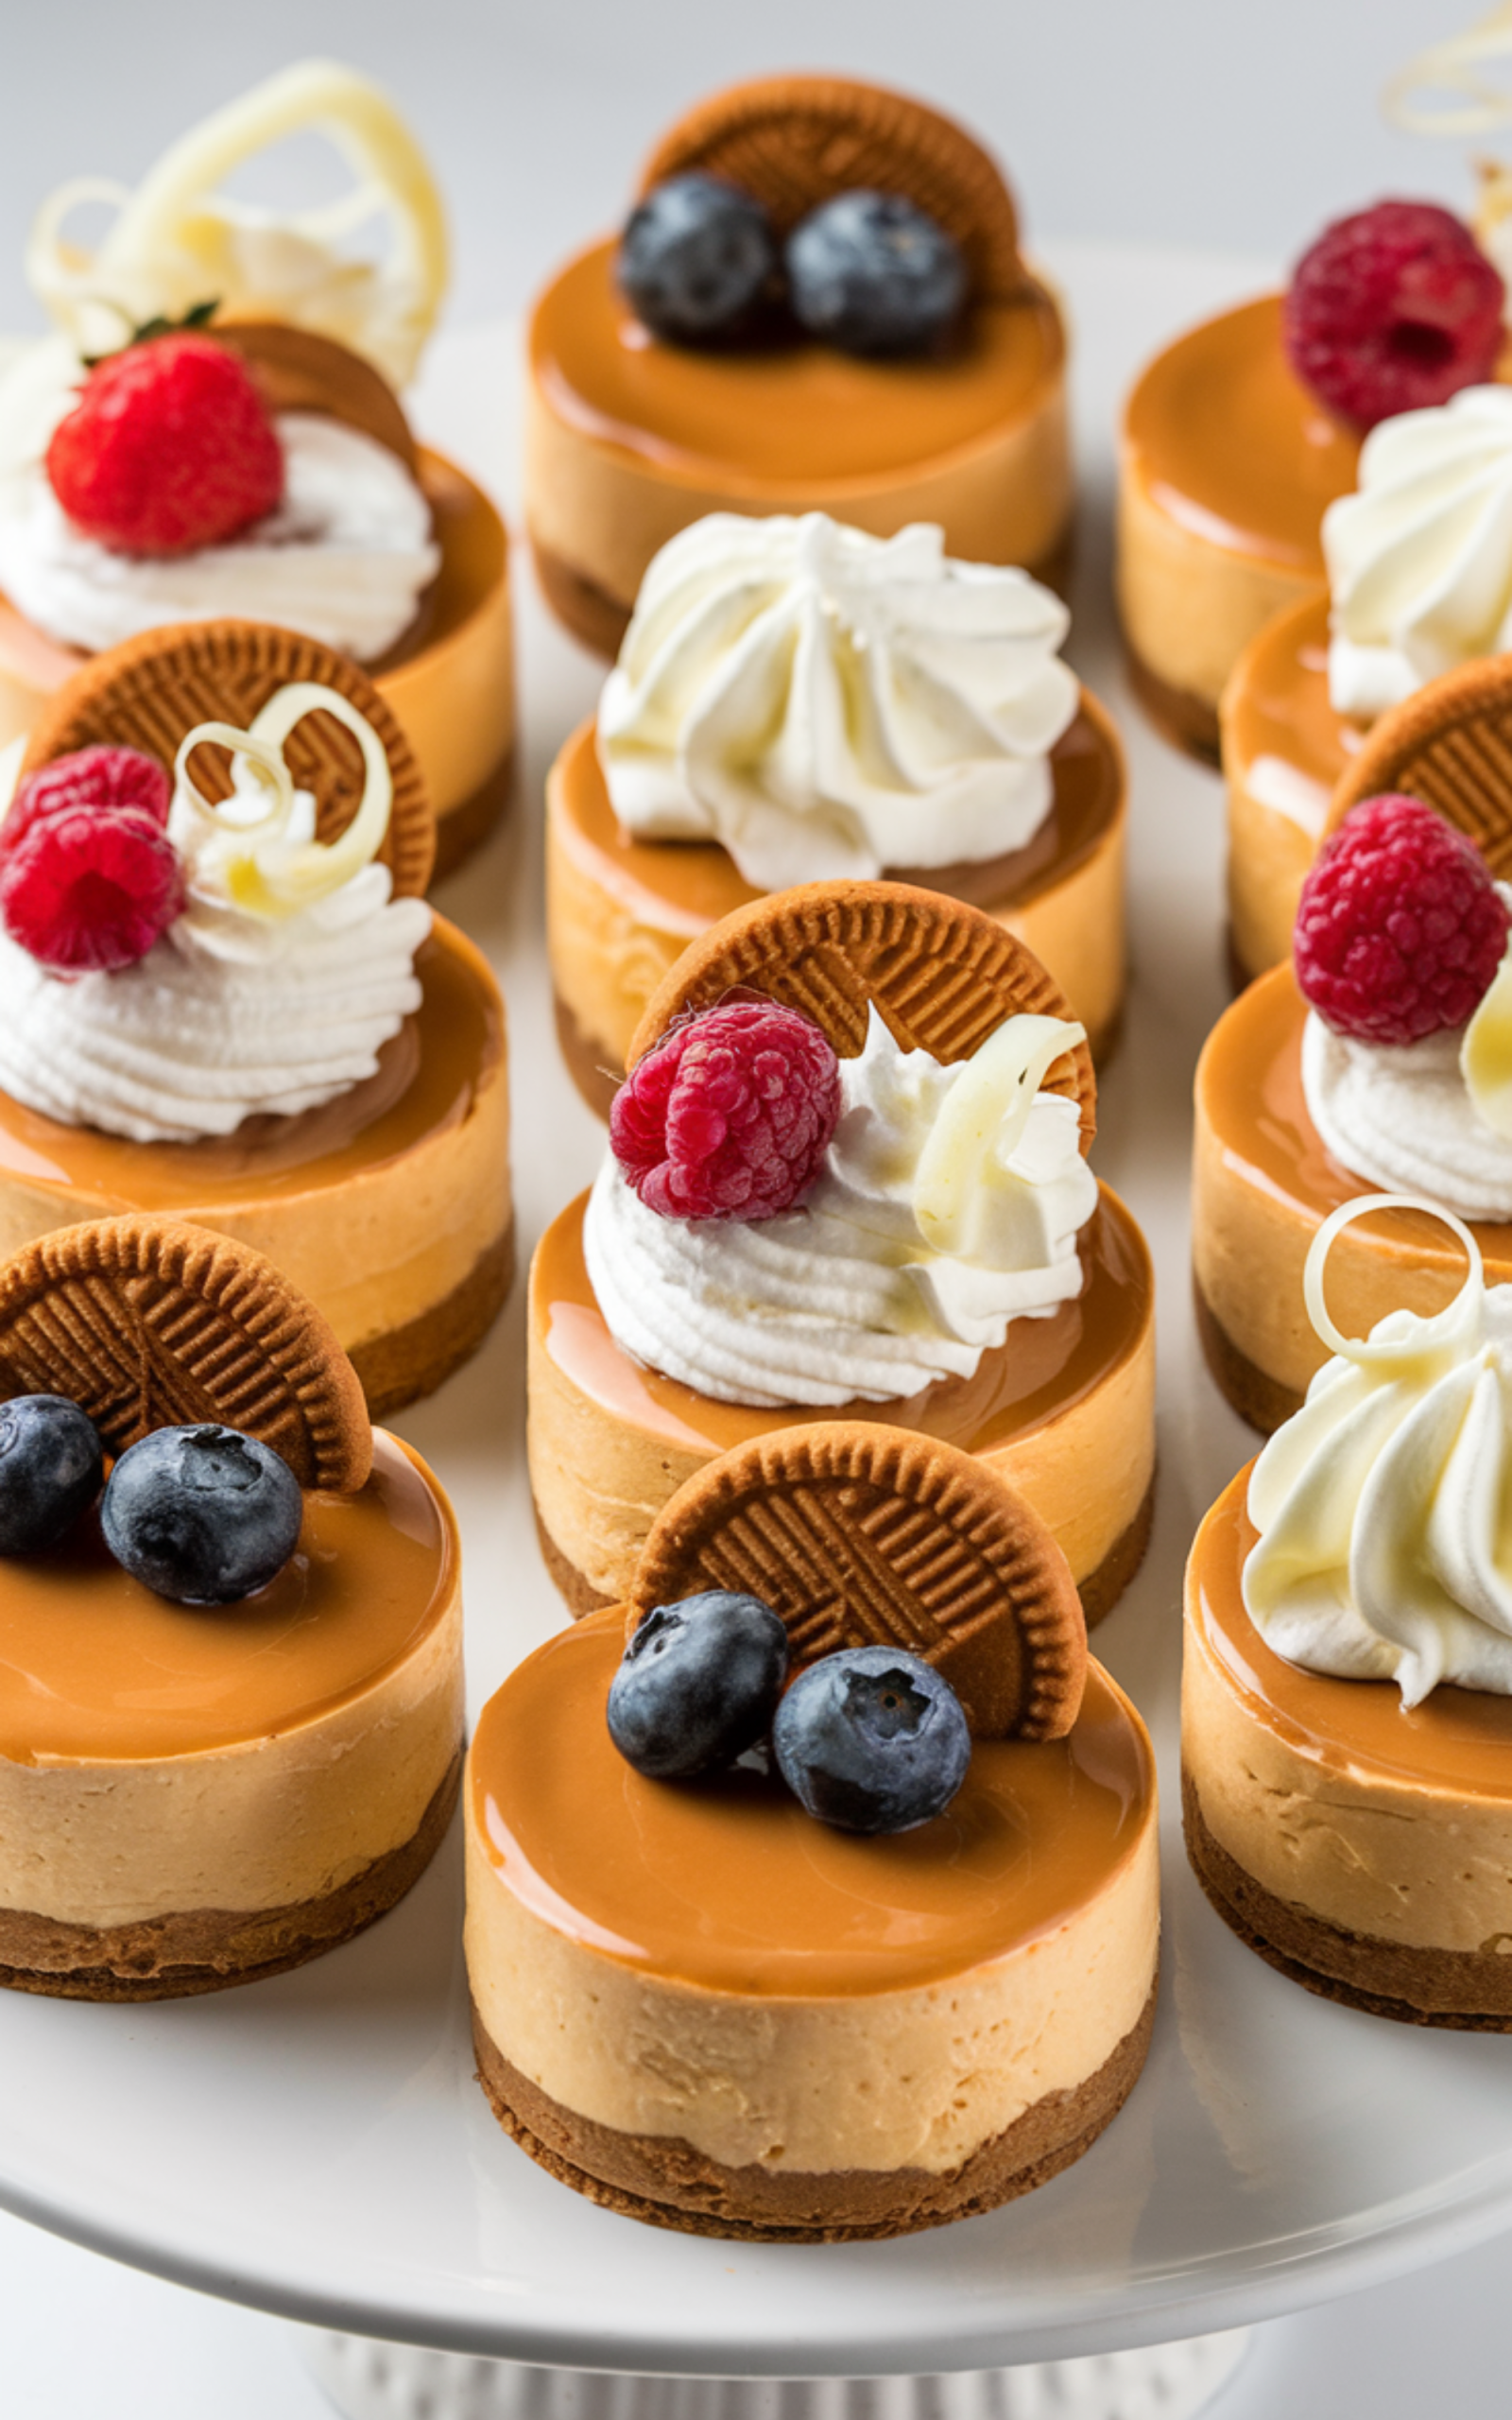
No Bake Mini Biscoff Cheesecakes
No Bake Mini Biscoff Cheesecakes are a delightful treat, and No Bake Mini Biscoff Cheesecakes make any snack moment special, whether at home or with friends. These No Bake Mini Biscoff Cheesecakes pair perfectly with Caramel Cream Cold Foam Coffee, chocolate truffles, fruit skewers, almond croissants, mini muffins, or spiced latte bites, making No Bake Mini Biscoff Cheesecakes irresistible.
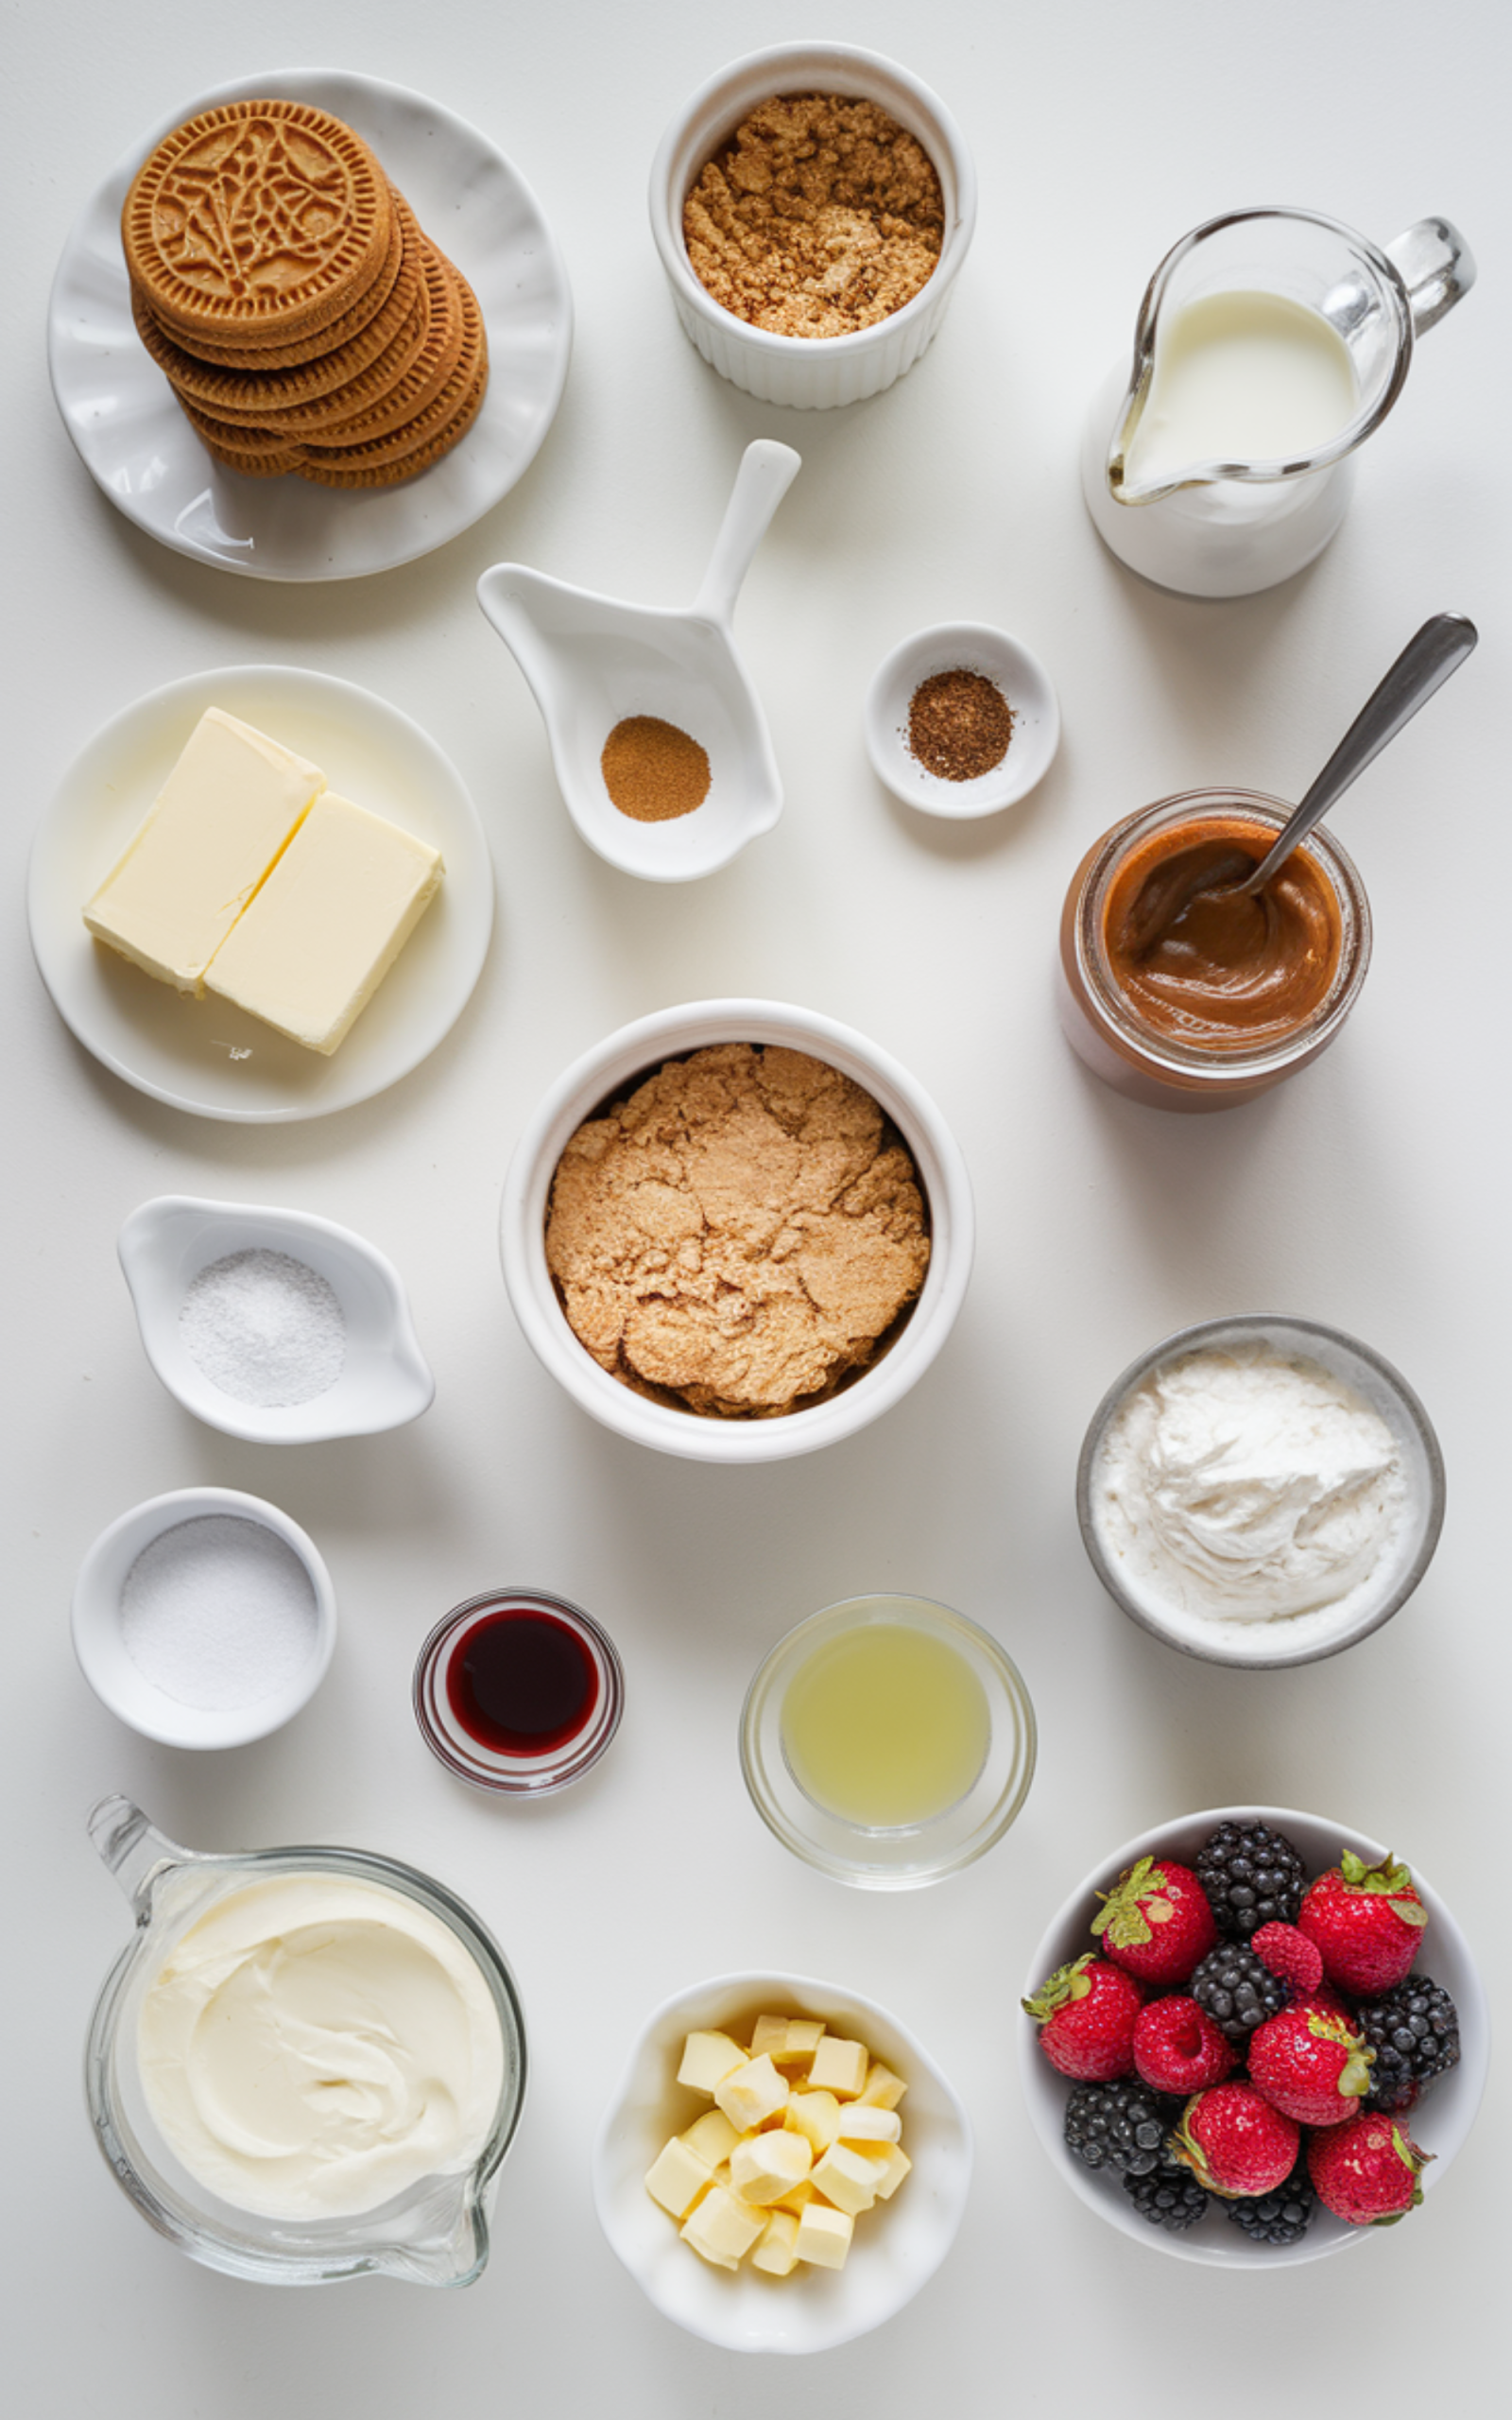
INGREDIENTS
- Biscoff cookies
- Unsalted butter
- Cream cheese
- Heavy cream
- Powdered sugar
- Vanilla extract
- Biscoff spread
- Salt
- Fresh lemon juice
- White chocolate
- Extra Biscoff cookies for topping
- Crushed cookie crumbs
- Optional whipped cream
- Optional fresh berries
- Optional chocolate curls
INGREDIENT NOTES
- Biscoff cookies: These create the signature caramelized base; crush them finely for a compact crust, or leave a slight texture if you enjoy a gentle crunch.
- Unsalted butter: Melted butter binds the cookie crumbs together; unsalted keeps flavor balanced, but salted can work if you reduce added salt slightly.
- Cream cheese: Full-fat cream cheese delivers the creamiest structure; always soften fully to avoid lumps and to ensure a silky cheesecake filling.
- Heavy cream: Whipped cream lightens the mixture; chill it well before whipping for faster volume and better stability.
- Powdered sugar: This dissolves smoothly, sweetens gently, and keeps the filling velvety; sift if clumpy.
- Vanilla extract: A small splash deepens flavor and rounds out the Biscoff notes; pure vanilla offers the cleanest taste.
- Biscoff spread: Warm slightly for easy swirling; this adds unmistakable spice and caramel warmth to every bite.
- Salt: A pinch sharpens sweetness and enhances complexity; do not skip, even in desserts.
- Fresh lemon juice: Just a little brightens the cream cheese and prevents the filling from tasting flat.
- White chocolate: Optional, but lovely for richness; melt gently and fold in for extra body.
- Extra Biscoff cookies for topping: Crumbled or halved cookies add texture and visual appeal.
- Crushed cookie crumbs: Sprinkle lightly for garnish, or press into the top for a bakery-style finish.
- Optional whipped cream: Pipe small rosettes for a celebratory look.
- Optional fresh berries: Strawberries or raspberries add contrast and freshness.
- Optional chocolate curls: A simple way to elevate presentation with minimal effort.
How to make No-Bake Mini Biscoff Cheesecakes?
Step 1: Prepare the cookie crust.
Crush the Biscoff cookies until fine, using a food processor or a sealed bag with a rolling pin; combine with melted butter and a tiny pinch of salt, then mix until evenly moistened. Spoon the mixture into mini cheesecake cups or a lined muffin tin, press firmly to form compact bases, and refrigerate while you prepare the filling, which helps the crust set and prevents crumbling later.
Step 2: Soften and smooth the cream cheese.
Place softened cream cheese in a large bowl, then beat until completely smooth; scrape the sides frequently to eliminate hidden lumps. Add powdered sugar, vanilla extract, and lemon juice, then continue mixing until glossy and uniform; this step is essential for professional texture.
Step 3: Whip the cream properly.
In a chilled bowl, whip heavy cream to medium peaks; stop when the cream holds shape but still looks soft. Overwhipping creates graininess, so slow down as peaks form, and finish by hand if needed for control.
Step 4: Fold the filling gently.
Fold whipped cream into the cream cheese mixture in two additions, using a spatula and broad strokes; keep air in the mixture for lightness. If using white chocolate, fold it in now, ensuring it is warm, not hot, to avoid melting the cream.
Step 5: Add Biscoff flavor.
Warm the Biscoff spread briefly until pourable, then swirl half directly into the filling for marbled flavor; reserve the rest for topping. Avoid overmixing, which would muddy the swirl and flatten the airy texture.
Step 6: Fill the crusts evenly.
Spoon or pipe the cheesecake filling over each chilled crust, smoothing the tops with an offset spatula. Tap the tray gently on the counter to release air pockets; this creates cleaner layers and prevents hidden bubbles.
Step 7: Chill to set.
Refrigerate the cheesecakes for at least four hours, or overnight for the best structure. No-Bake Mini Biscoff Cheesecakes rely on chilling rather than baking, so patience here guarantees neat slices and creamy centers.
Step 8: Decorate before serving.
Drizzle remaining Biscoff spread over each cheesecake, then finish with crushed cookies, optional whipped cream, berries, or chocolate curls. Keep decorations simple for a modern look, or go generous for festive gatherings.
Step 9: Serve with confidence.
Unmold carefully, wipe edges if needed, and plate. For a clean presentation, warm your knife briefly between cuts if serving from a larger mold; mini portions usually lift out effortlessly.
Step 10: Troubleshooting tips.
If your filling feels loose, chill longer; if crusts crumble, press more firmly next time; if swirls disappear, drizzle Biscoff after filling rather than folding too much. These small adjustments transform good desserts into bakery-level No Bake Mini Biscoff Cheesecakes.
Kitchen Equipment Needed
- Food processor or rolling pin
- Mixing bowls
- Hand mixer or stand mixer
- Rubber spatula
- Measuring cups
- Mini cheesecake cups or muffin tin
- Paper liners
- Offset spatula or spoon
- Small microwave-safe bowl
Storage Options
Store No Bake Mini Biscoff Cheesecakes in an airtight container in the refrigerator for up to four days; keep toppings light until serving to preserve texture and shine. For longer storage, freeze undecorated cheesecakes individually, wrap tightly, and freeze up to one month; thaw overnight in the fridge, then add fresh toppings before serving for the best flavor and appearance.
Other Variations to Try
Switch the crust to graham crackers or chocolate cookies for contrast, swirl in peanut butter for nutty depth, or fold in finely chopped chocolate for texture. You can also flavor the filling with espresso powder, orange zest, or cinnamon, or top with salted caramel, toasted nuts, or coconut flakes. For lighter desserts, reduce sugar slightly and add extra whipped cream; for richer results, increase Biscoff spread and finish with a white chocolate drizzle.
FAQ
Can I make No-Bake Mini Biscoff Cheesecakes ahead of time?
Yes, these cheesecakes are ideal for make-ahead desserts. Prepare them up to two days in advance, store covered in the refrigerator, and decorate shortly before serving for the freshest look.
Why is my filling not setting properly?
This usually happens when cream is underwhipped, cream cheese is too warm, or chilling time is shortened. Whip cream to medium peaks, ensure cream cheese is softened but cool, and allow adequate refrigeration.
Can I use low-fat cream cheese?
You can, but the texture will be softer and the flavor less rich. Full-fat cream cheese provides structure and mouthfeel that define classic No Bake Mini Biscoff Cheesecakes.
How do I prevent lumps in the filling?
Always beat cream cheese alone first until perfectly smooth, then add sweeteners and flavorings. Scrape the bowls often, and fold the whipped cream gently to maintain its silkiness.
Are these cheesecakes freezer-friendly?
Yes, freeze undecorated portions tightly wrapped. Thaw in the refrigerator, then finish with Biscoff drizzle and toppings just before serving.
Can I make one large cheesecake instead of minis?
Absolutely; press the crust into a springform pan, spread filling evenly, chill thoroughly, and slice with a warm knife. Increase chilling time to ensure clean cuts.
What pairs best with No-Bake Mini Biscoff Cheesecakes?
Coffee, espresso drinks, hot chocolate, fresh fruit, and light teas complement the caramel spice beautifully; Caramel Cream Cold Foam Coffee is especially popular for cozy afternoons.
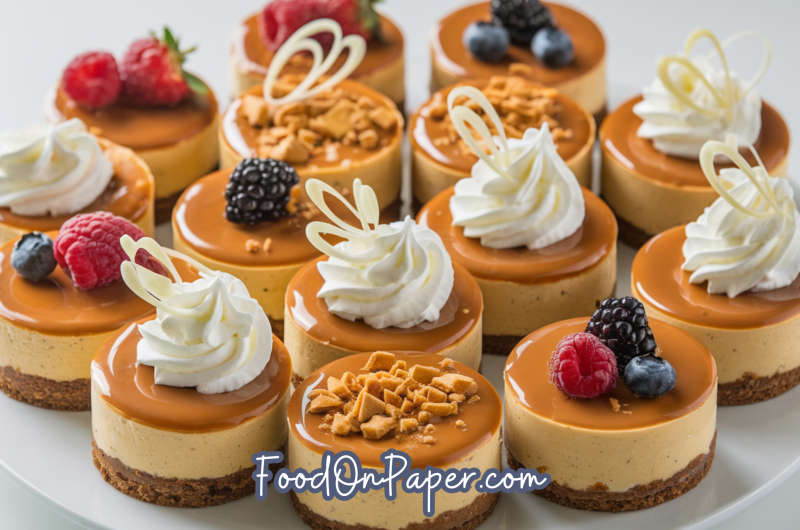
No-Bake Mini Biscoff Cheesecakes
Course: DessertCuisine: AmericanDifficulty: EasyServings
16
servingsPrep time
30
minutesCooking timeminutes
Calories
320
kcalTotal time
30
minutesA creamy, no-bake dessert with Biscoff cookie crust and luscious cheesecake filling, perfect for parties and snacks.
Ingredients
Biscoff cookies
Unsalted butter
Cream cheese
Powdered sugar
Vanilla extract
Heavy cream
Biscoff spread
Chocolate chips
Sea salt flakes
Milk
Optional: caramel sauce
Optional: chopped Biscoff cookies
Directions
- Crush the Biscoff cookies into fine crumbs using a food processor or rolling pin; melt the unsalted butter and combine it with the crumbs, mixing thoroughly until evenly coated; press the mixture firmly into a lined mini cheesecake tin or silicone mold, ensuring a smooth and compact base; refrigerate while preparing the filling to help set the crust and prevent sogginess.
- In a mixing bowl, beat the softened cream cheese until smooth and creamy, avoiding overmixing; gradually add powdered sugar and continue beating until fully incorporated; add vanilla extract and a few spoonfuls of Biscoff spread, folding gently to maintain airiness; whip heavy cream in a separate bowl until soft peaks form, then fold carefully into the cream cheese mixture, ensuring a uniform, light, and fluffy texture; taste and adjust sweetness if necessary, adding more Biscoff spread for extra flavor.
- Spoon or pipe the filling over the chilled cookie crust in individual molds, filling evenly to the top; smooth the surface with an offset spatula or the back of a spoon, creating a flat or slightly domed top; optional: sprinkle chopped Biscoff cookies lightly over the top for added texture; cover each mini cheesecake with plastic wrap to prevent drying, then refrigerate for at least 4 hours, preferably overnight, to ensure proper set and firmness.
- Melt chocolate chips with a splash of milk using a double boiler or microwave in short bursts, stirring frequently to avoid burning; for caramel drizzle, warm the sauce slightly to pourable consistency; once melted or warmed, drizzle over the set mini cheesecakes using a spoon or piping bag, creating decorative patterns; optionally, add a few sea salt flakes to enhance flavor contrast and visual appeal.
- Carefully remove the mini cheesecakes from the silicone molds or tins, running a thin knife around the edges if needed; place on serving plates and add any additional garnishes, such as extra Biscoff crumbs, chocolate curls, or caramel sauce; serve chilled for best texture and flavor, ensuring each cheesecake maintains its creamy consistency and intact shape.
- Avoid overwhipping the cream or cream cheese mixture, as it can result in a grainy texture; if filling appears too soft, refrigerate longer; for a firmer crust, bake lightly for 5 minutes at 175°C before chilling, though the recipe is intended fully no-bake; experiment with mini silicone molds of different shapes for creative presentation; allow cheesecakes to reach room temperature briefly before serving if refrigerator-cold is too firm.