Do you love easy, delicious recipes? Join the Food On Paper family and never miss a recipe
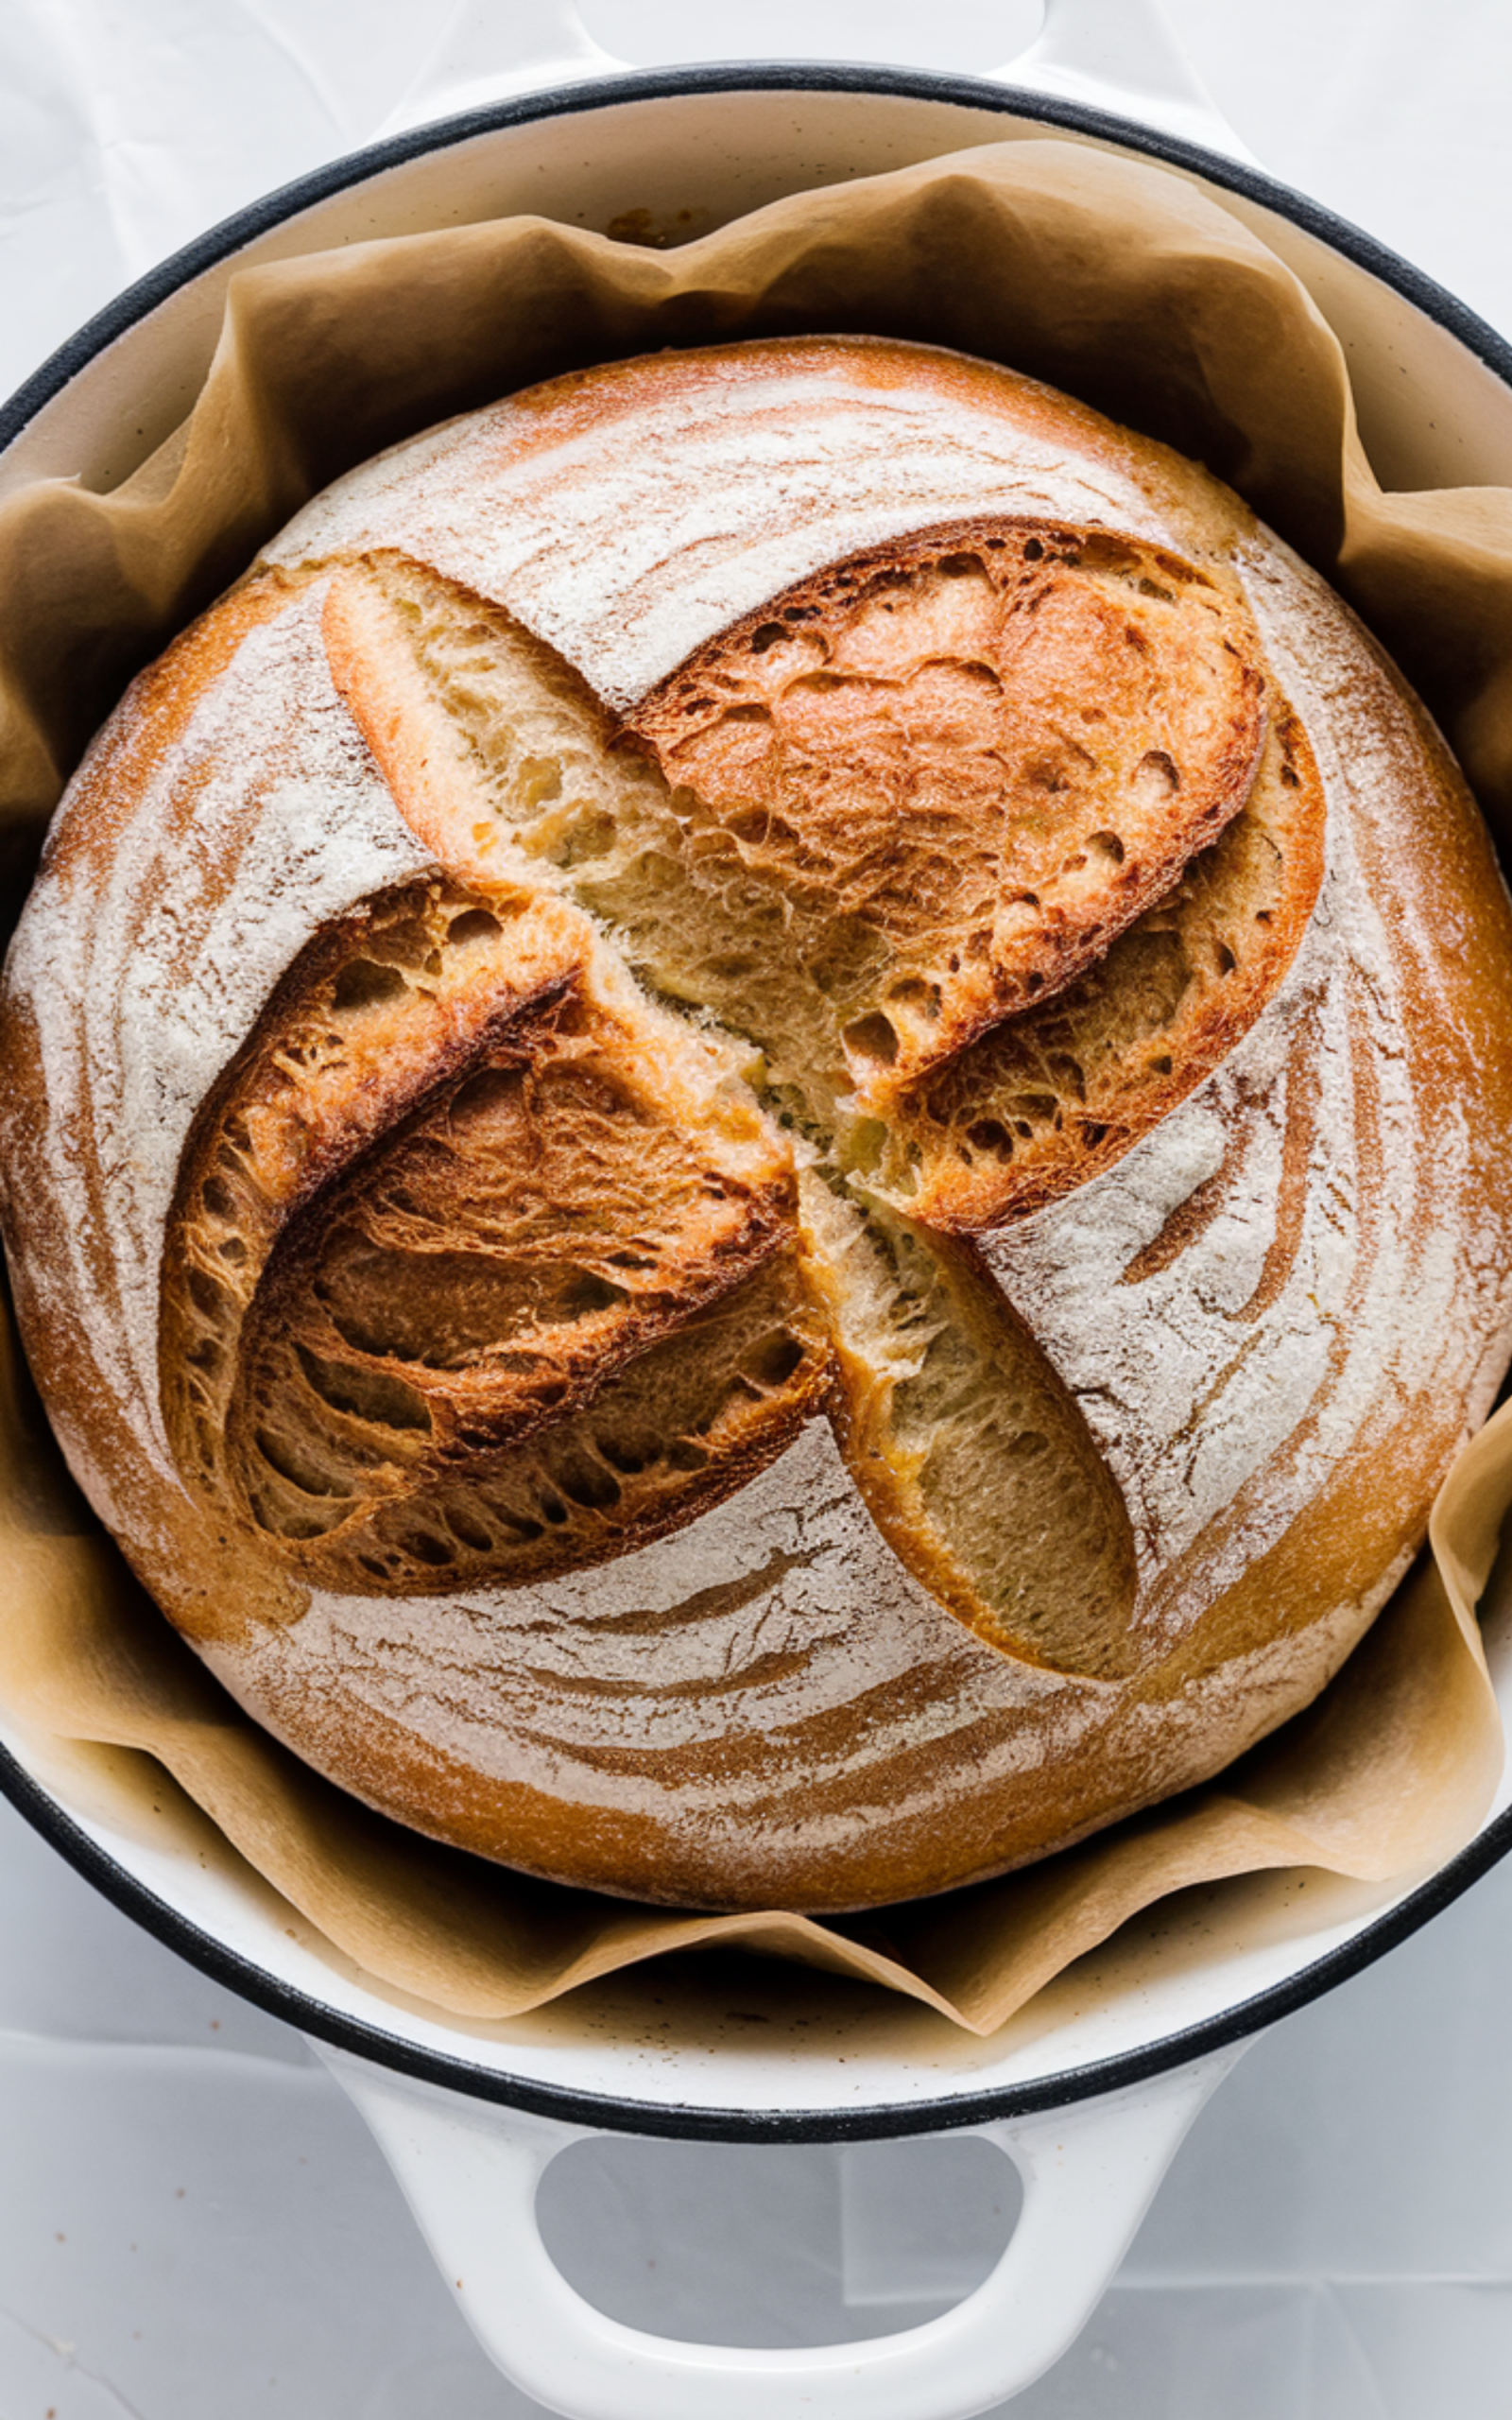
no knead bread
I love starting my weekend mornings with no-knead bread fresh from the oven—it’s become my go-to easy breakfast treat. I remember one rainy Saturday when I paired my warm no-knead bread with homemade scrambled eggs, a smear of creamy avocado, and a drizzle of honey; it felt like a little cozy celebration. For a snack later, I sliced some for no-knead bread, Crispy Cajun Shrimp Bites, or even toasted it with almond butter and jam—it’s that versatile and comforting.
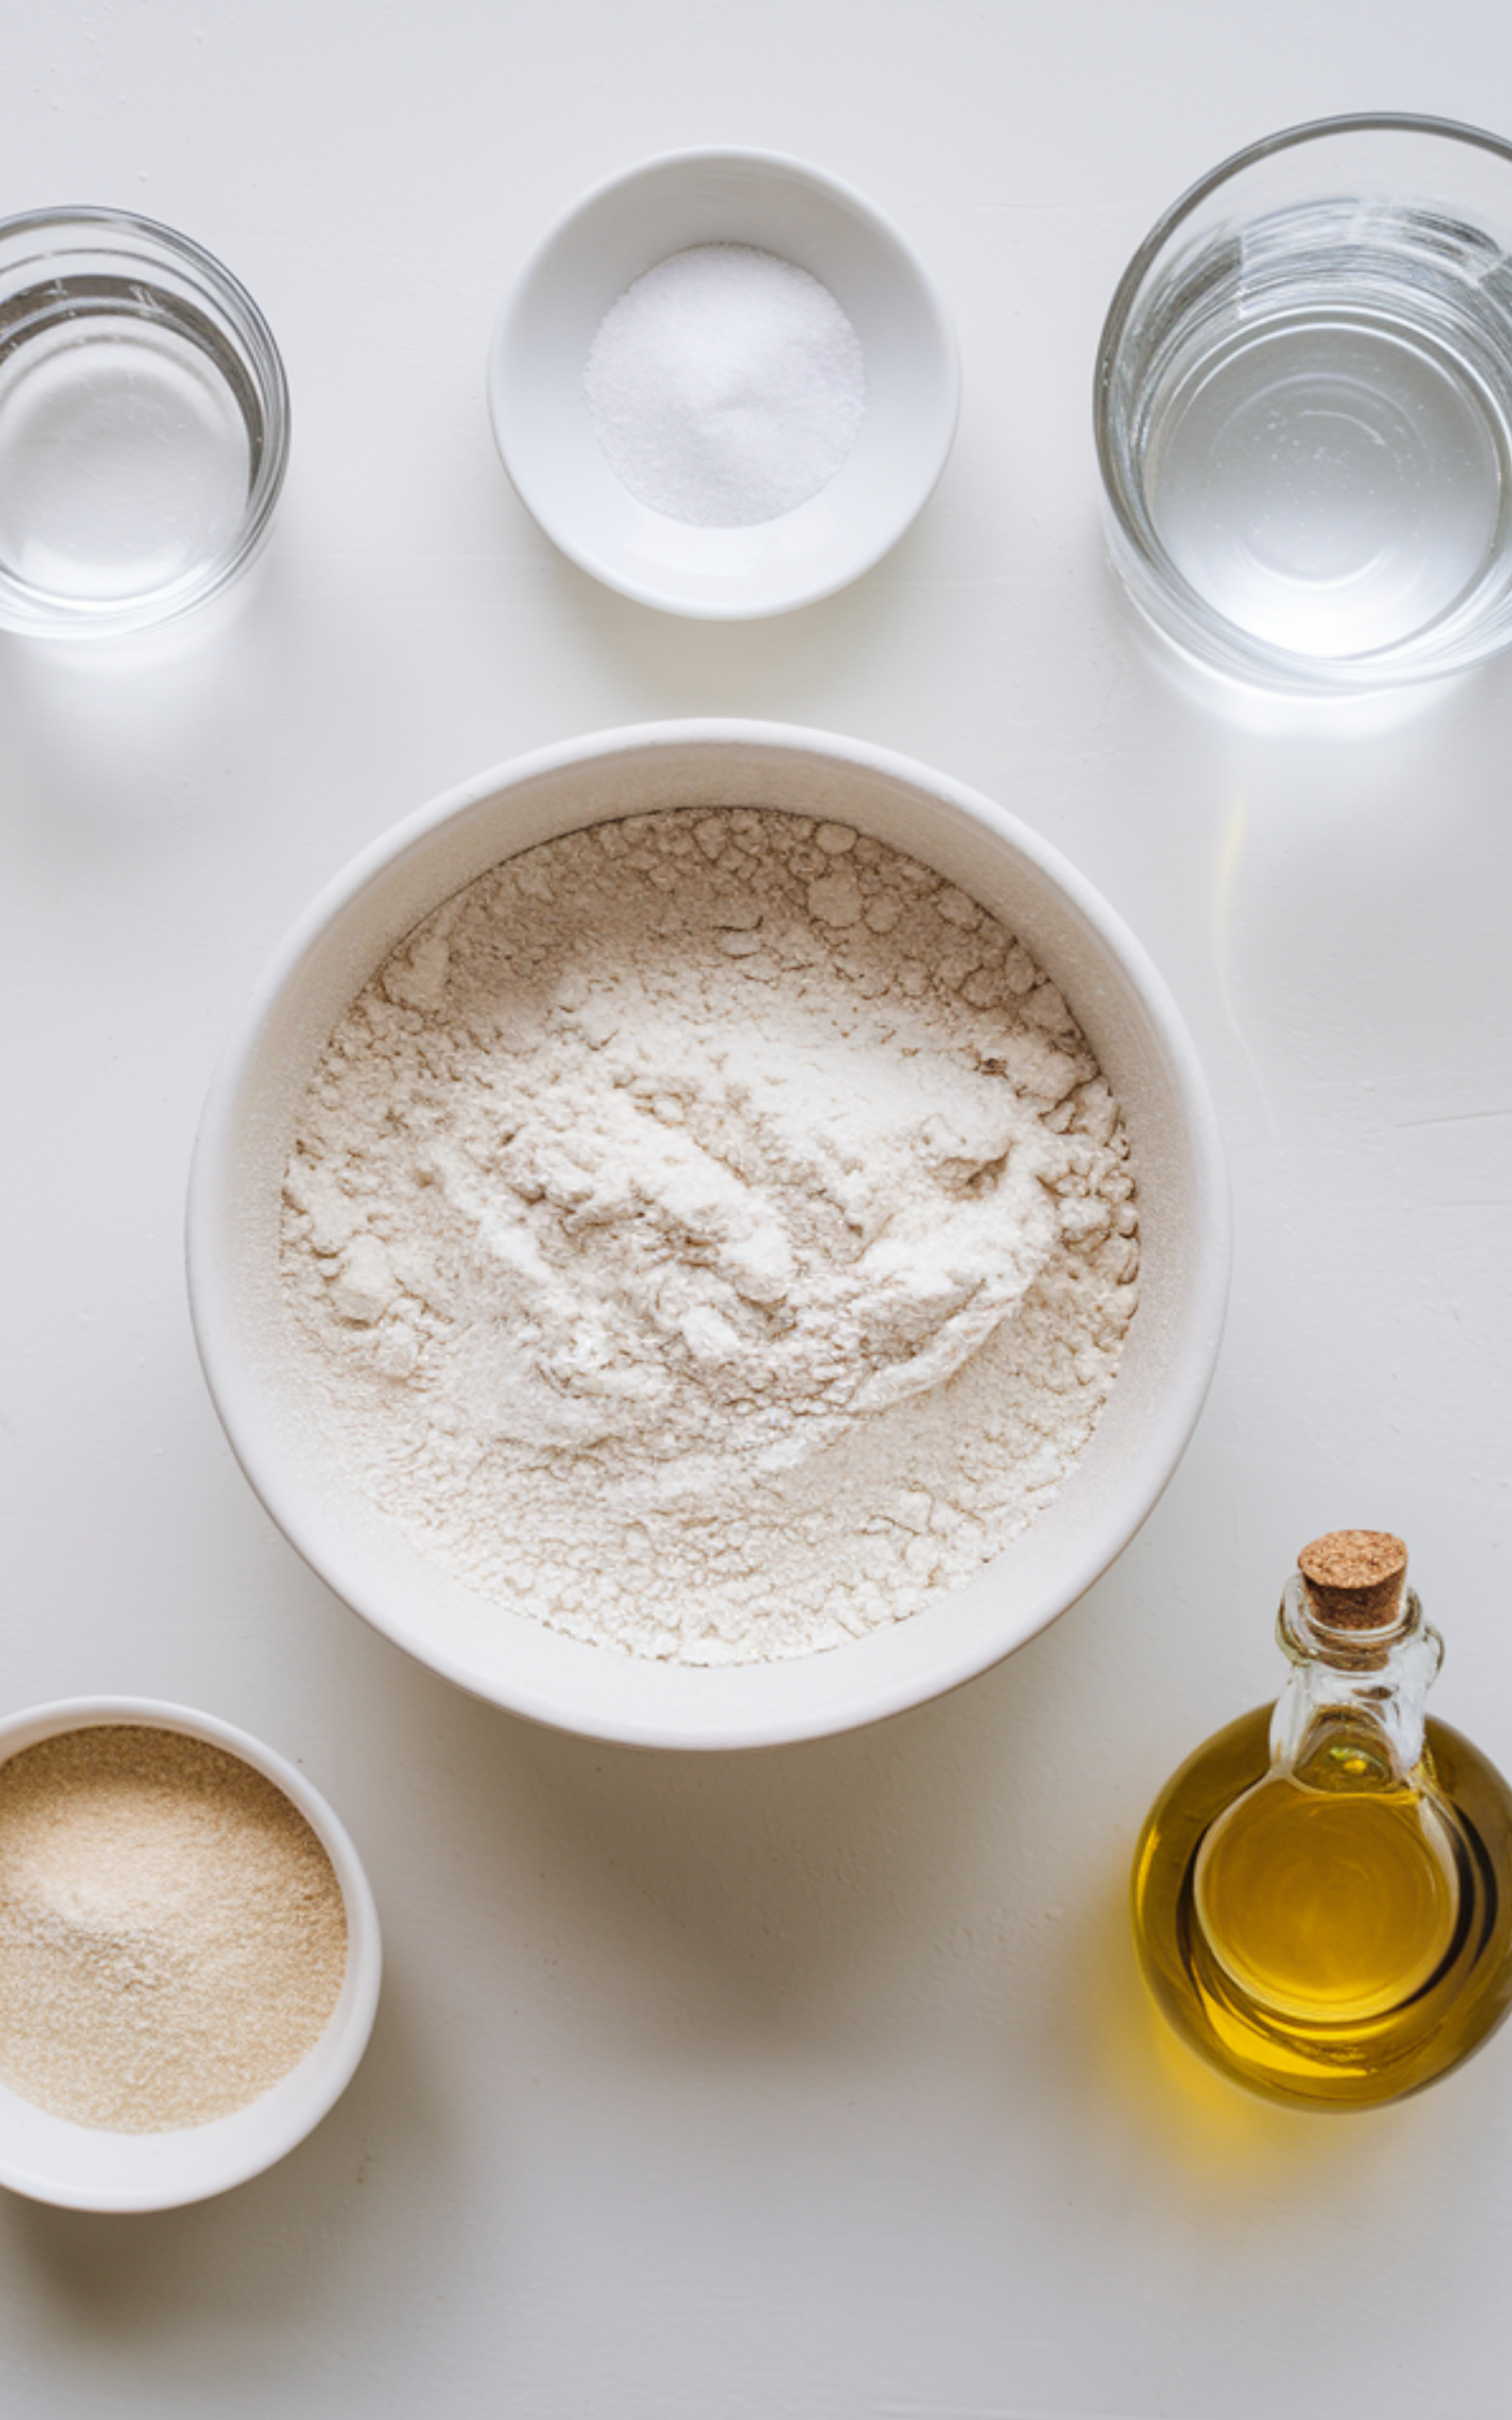
Ingredients
- All-purpose flour
- Instant yeast
- Salt
- Warm water
- Olive oil or melted butter (optional)
- Cornmeal or flour for dusting
Ingredient Notes
- All-purpose flour: Provides structure; can substitute with bread flour for a chewier texture.
- Instant yeast: Ensures rise without proofing; active dry yeast can be used with a slightly longer rise.
- Salt: Enhances flavor and strengthens dough; adjust to taste.
- Warm water: Activates yeast and hydrates flour; temperature should be around 105–110°F.
- Olive oil or melted butter: Optional for added richness and soft crust; can be omitted for a classic crust.
- Cornmeal or flour for dusting: Prevents sticking to the bowl or baking vessel; coarse cornmeal adds texture to the crust.
How to Make No-Knead Bread?
Step 1: Combine Dry Ingredients
In a large mixing bowl, whisk together all-purpose flour, instant yeast, and salt until fully blended. Make sure yeast and salt do not touch directly to avoid inhibiting the rise.
Step 2: Add Water
Pour in warm water gradually while stirring with a wooden spoon or silicone spatula. Mix until a sticky, shaggy dough forms. Avoid over-mixing; a slightly uneven texture is ideal for no-knead bread.
Step 3: Optional Fat Addition
If using olive oil or melted butter, fold it in gently at this stage. This adds richness and a slightly softer crumb, but it is not necessary for a classic loaf.
Step 4: First Rise
Cover the bowl loosely with plastic wrap or a damp kitchen towel. Let the dough rest at room temperature for 12–18 hours. Dough should double in size and show bubbles on the surface. Longer rise develops more flavor.
Step 5: Preheat Oven
Place a heavy Dutch oven or oven-safe pot with a lid in the oven. Preheat to 450°F (232°C) for at least 30 minutes. Preheating ensures a crisp crust and proper oven spring.
Step 6: Shape the Dough
Generously flour a work surface and scrape the dough onto it. Using floured hands, fold the dough over itself gently once or twice to shape into a rough ball. Do not knead; maintain air pockets.
Step 7: Prepare for Baking
Place the shaped dough on a parchment-lined piece of parchment paper or sprinkle with cornmeal. Carefully remove the hot Dutch oven from the oven, lift the dough with parchment, and place it inside. Cover with the lid immediately.
Step 8: Bake Covered
Bake covered at 450°F (232°C) for 30 minutes. The lid traps steam, helping form a golden, crispy crust while keeping the interior moist.
Step 9: Uncover and Finish Baking
Remove the lid carefully and bake an additional 10–15 minutes. The crust should turn deep golden brown. Optional: rotate the pot halfway for even browning.
Step 10: Cool
Remove bread from the Dutch oven and transfer to a wire rack. Let cool completely, at least 1 hour, before slicing. Cutting too early can compress the crumb and make it gummy.
Kitchen Equipment Needed
- Large mixing bowl
- Wooden spoon or silicone spatula
- Plastic wrap or kitchen towel
- Heavy Dutch oven or oven-safe pot with lid
- Parchment paper
- Wire cooling rack
- Measuring cups and spoons
Pro Tips for Best Results
For the best no-knead bread, use high-quality flour and avoid rushing the long fermentation; the extended rise develops complex flavor. Ensure the Dutch oven is fully preheated to create a dramatic oven spring and crisp crust. Handle the dough gently to preserve air pockets. Avoid slicing too soon—waiting at least an hour is crucial for a perfect crumb.
Storage, Freezing, and Reheating
Store no-knead bread at room temperature in a paper bag for up to 3 days; avoid plastic bags as they soften the crust. For longer storage, slice and freeze in airtight freezer bags for up to 3 months. Reheat slices in a toaster or the whole loaf in a 350°F oven for 10–15 minutes to restore crust crispness and warm the crumb.
Recipe Variations and Substitutions
No-knead bread is highly versatile. Substitute all-purpose flour with whole wheat for a heartier loaf, or add herbs like rosemary or thyme for flavor twists. Mix in seeds, olives, or sun-dried tomatoes for a rustic variation. For dietary preferences, use gluten-free flour blends with xanthan gum to mimic structure. Adjust hydration slightly for denser flours; this recipe works exceptionally well in US kitchens with standard ovens and Dutch ovens.
FAQ
What makes bread no-knead?
No-knead bread relies on long fermentation rather than manual kneading to develop gluten and structure. Time replaces effort.
Can I use active dry yeast instead of instant yeast?
Yes, but activate it in warm water for 5–10 minutes before mixing with dry ingredients. Expect a slightly longer rise.
How do I know when the bread is fully baked?
Check the crust color—it should be deep golden brown. Tap the bottom; it should sound hollow. Internal temperature should reach 200–210°F.
Can I make no-knead bread without a Dutch oven?
Yes, use a heavy baking sheet or a covered oven-safe pot, but the crust may be slightly less crisp.
How long can I keep no-knead bread?
At room temperature, it stays fresh for up to 3 days. Freezing extends shelf life to 3 months.
Can I add flavors to no-knead bread?
Absolutely. Herbs, spices, olives, cheese, or seeds can be folded in during shaping for variety.
Why is my bread dense or gummy?
This usually results from under-proofing, over-handling, or slicing too soon. Ensure long fermentation and gentle handling.
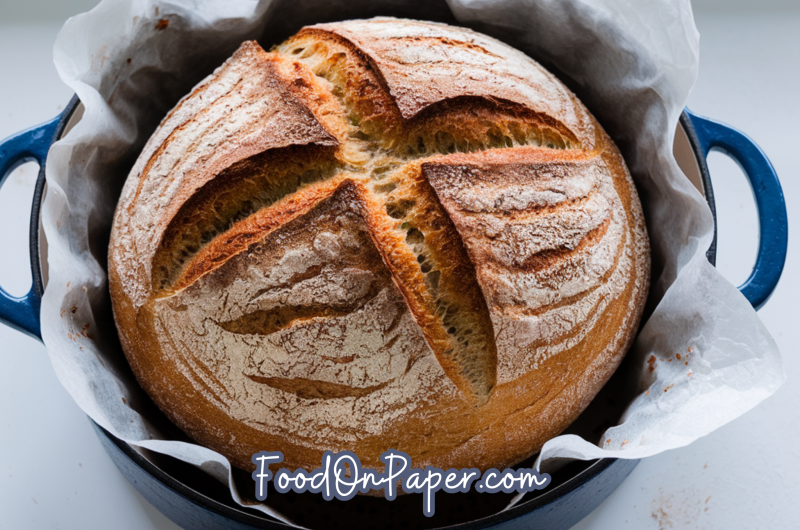
no knead bread
Course: BreakfastCuisine: AmericanDifficulty: EasyServings
1
servingsPrep time
15
minutesCooking time
45
minutesCalories
180
kcalTotal time
1
hourEasy no-knead bread with a crisp crust and soft interior. Minimal effort, long flavor development, perfect for sandwiches or toast.
Ingredients
All-purpose flour
Instant yeast
Salt
Warm water
Olive oil or melted butter (optional)
Cornmeal or flour for dusting
Directions
- In a large mixing bowl, whisk together all-purpose flour, instant yeast, and salt until fully blended. Make sure yeast and salt do not touch directly to avoid inhibiting the rise.
- Pour in warm water gradually while stirring with a wooden spoon or silicone spatula. Mix until a sticky, shaggy dough forms. Avoid over-mixing; a slightly uneven texture is ideal for no-knead bread.
- If using olive oil or melted butter, fold it in gently at this stage. This adds richness and a slightly softer crumb, but is not necessary for a classic loaf.
- Cover the bowl loosely with plastic wrap or a damp kitchen towel. Let the dough rest at room temperature for 12–18 hours. Dough should double in size and show bubbles on the surface. Longer rise develops more flavor.
- Place a heavy Dutch oven or oven-safe pot with a lid in the oven. Preheat to 450°F (232°C) for at least 30 minutes. Preheating ensures a crisp crust and proper oven spring.
- Generously flour a work surface and scrape the dough onto it. Using floured hands, fold the dough over itself gently once or twice to shape into a rough ball. Do not knead; maintain air pockets.
- Place the shaped dough on a parchment-lined piece of parchment paper or sprinkle with cornmeal. Carefully remove the hot Dutch oven from the oven, lift the dough with parchment, and place it inside. Cover with the lid immediately.
- Bake covered at 450°F (232°C) for 30 minutes. The lid traps steam, helping form a golden, crispy crust while keeping the interior moist.
- Remove the lid carefully and bake an additional 10–15 minutes. The crust should turn deep golden brown. Optional: rotate the pot halfway for even browning.
- Remove bread from the Dutch oven and transfer to a wire rack. Let cool completely, at least 1 hour, before slicing. Cutting too early can compress the crumb and make it gummy.