Do you love easy, delicious recipes? Join the Food On Paper family and never miss a recipe
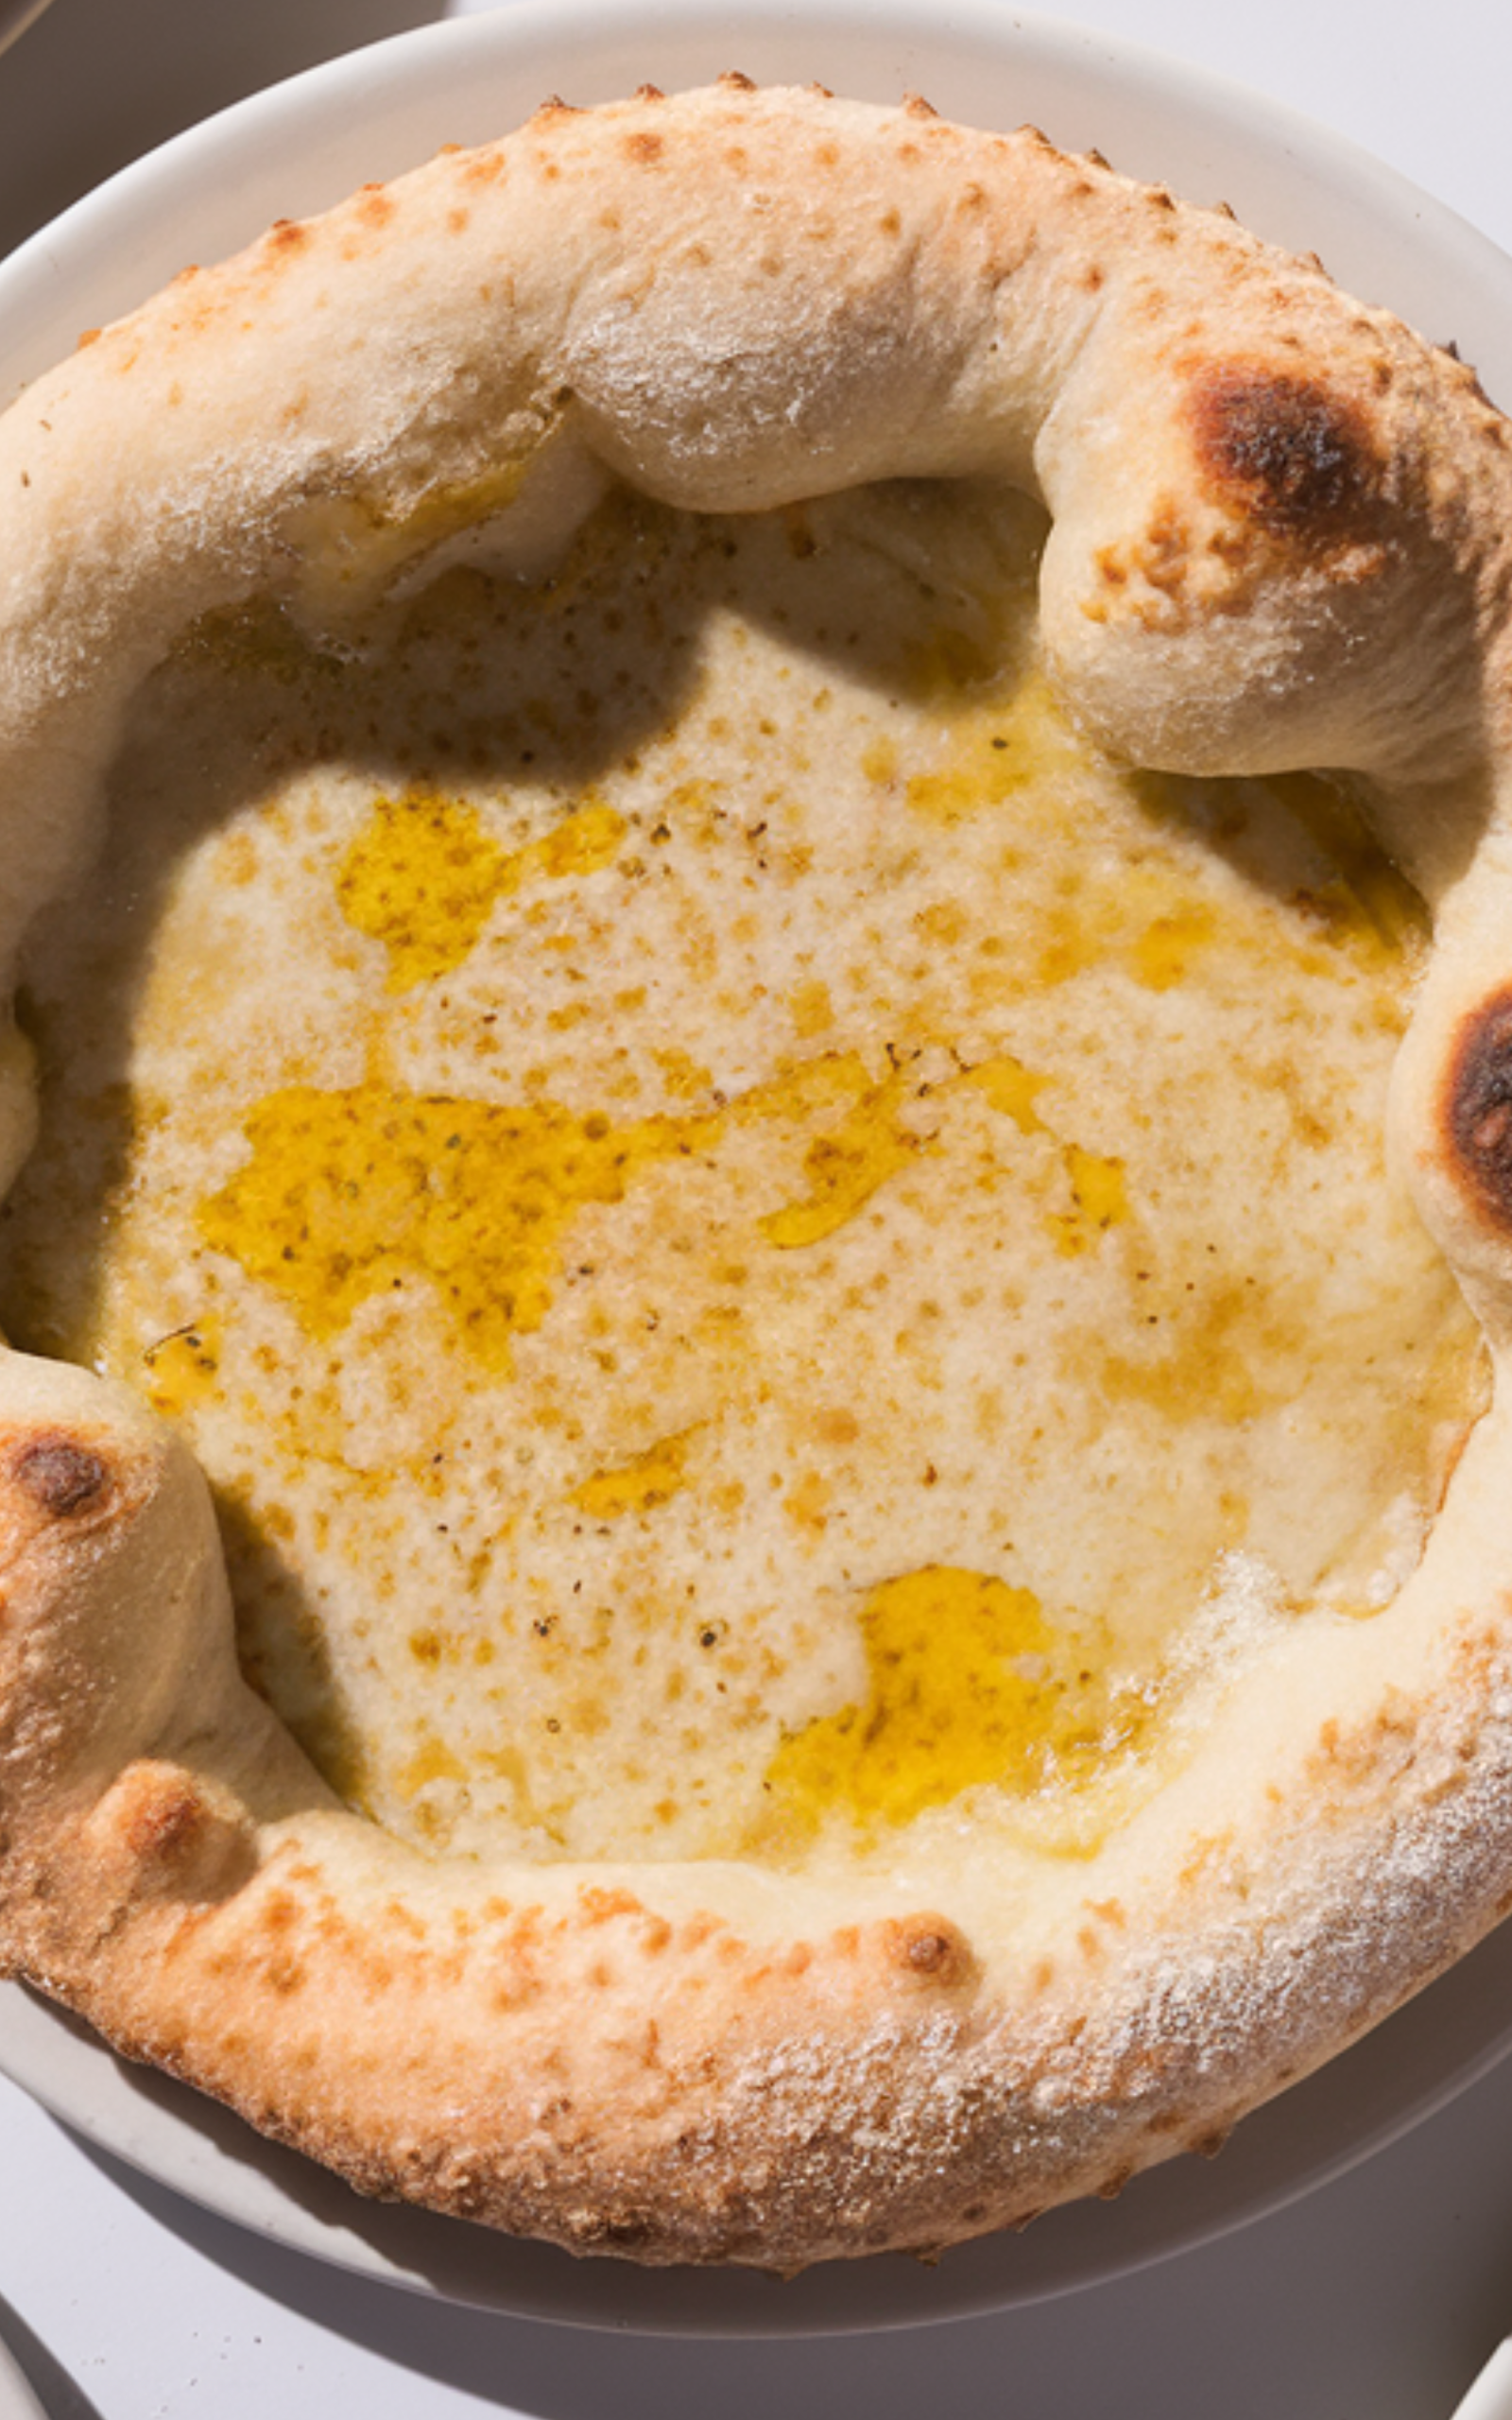
Perfect Pizza Crust
As a busy mom, I’ve made Perfect Pizza Crust so many times, usually on chaotic Friday nights with kids helping and flour everywhere. I keep coming back to Perfect Pizza Crust because it never fails, especially with Vanilla Cream Cold Brew, Garlic Butter Parmesan Knots, and a Simple Caesar Salad. Once you know Perfect Pizza Crust, pizza night becomes an easy, cozy family ritual.
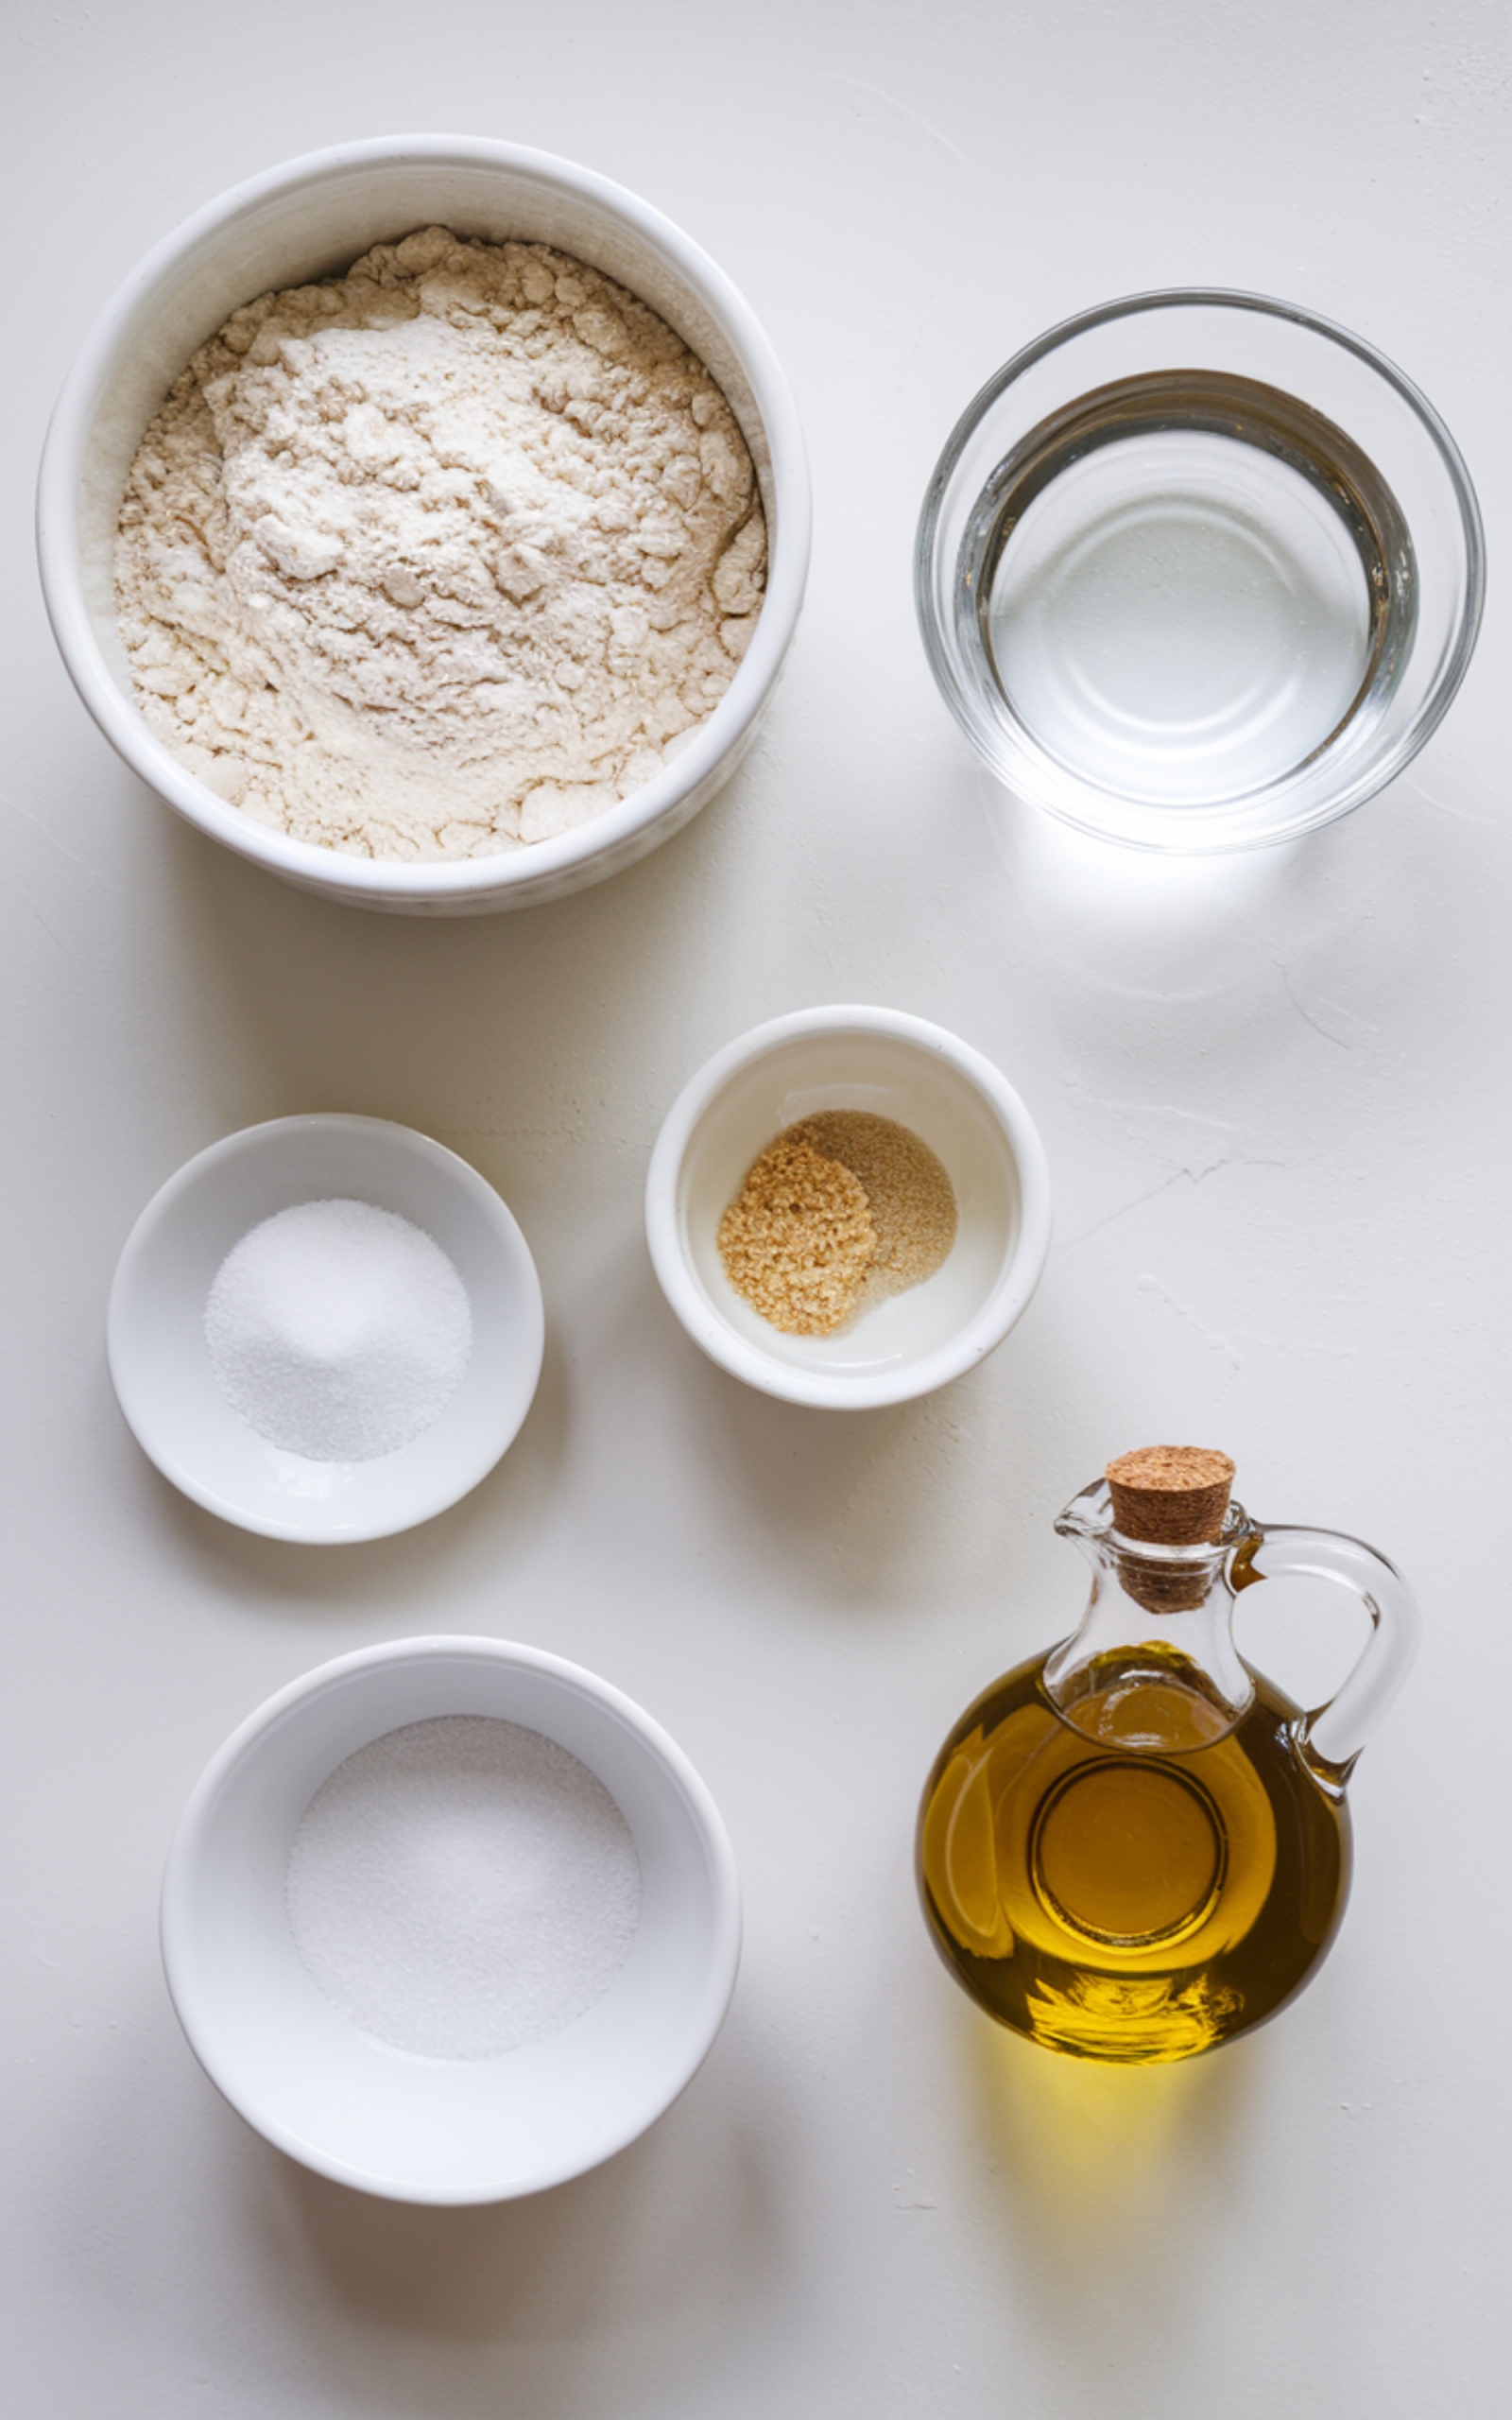
Ingredients
- All-purpose flour
- Warm water
- Active dry yeast
- Granulated sugar
- Salt
- Olive oil
Ingredient Notes
- All-purpose flour: Creates a balanced, perfect pizza crust with structure and tenderness. Bread flour can be used for a chewier result.
- Warm water: Activates the yeast properly. Water that is too hot can kill yeast, while cold water slows fermentation.
- Active dry yeast: Responsible for rise and flavor development in the perfect pizza crust. Instant yeast can be substituted with slight timing adjustments.
- Granulated sugar: Feeds the yeast and supports browning during baking. Honey can be used as an alternative.
- Salt: Enhances flavor and strengthens gluten for better texture in the perfect pizza crust.
- Olive oil: Adds moisture, flavor, and helps create a tender interior with crisp edges.
How to Make Perfect Pizza Crust?
Step 1: Activate the Yeast
In a large mixing bowl, combine warm water and granulated sugar. Sprinkle the yeast evenly over the surface. Let it rest undisturbed until the mixture becomes foamy. This confirms that the yeast is active and ready to build structure in your perfect pizza crust.
If no foam appears, the yeast may have expired, or the water temperature may be incorrect. Start again for best results.
Step 2: Add Salt and Olive Oil
Stir the salt and olive oil into the yeast mixture once it is fully activated. Mixing these ingredients now ensures even distribution and prevents salt from directly contacting the yeast before activation. This balance is key for a well-flavored, perfect pizza crust.
Step 3: Incorporate the Flour Gradually
Add the flour in stages, stirring with a wooden spoon or dough whisk. Continue mixing until a shaggy dough forms. Gradual incorporation prevents lumps and allows hydration to occur evenly, which improves gluten formation.
Step 4: Knead the Dough Properly
Transfer the dough to a lightly floured surface. Knead using the heel of your hand, folding and rotating the dough. Continue kneading until the dough is smooth, elastic, and slightly tacky but not sticky.
Proper kneading is essential for a perfect pizza crust with good stretch and chew. Under-kneading leads to tearing, while over-kneading can make the dough tough.
Step 5: First Rise
Place the dough in a lightly oiled bowl and turn it to coat all sides. Cover with a clean kitchen towel or plastic wrap. Let it rise in a warm, draft-free area until doubled in size.
This fermentation stage develops flavor and creates air pockets that give the perfect pizza crust its light interior.
Step 6: Punch Down and Rest
Gently punch down the risen dough to release excess gas. This step redistributes yeast and sugars, improving texture. Let the dough rest briefly before shaping to relax the gluten and make it easier to stretch.
Step 7: Shape the Dough
Transfer the dough to a floured surface. Press gently from the center outward, leaving a slightly thicker edge for the crust. Avoid rolling pins if possible, as they remove air bubbles that contribute to a light, perfect pizza crust.
Step 8: Final Proof
Allow the shaped dough to rest for a short period before baking. This final proof improves oven spring and prevents shrinking during baking.
Step 9: Preheat the Oven
Preheat your oven thoroughly to a high temperature. A hot oven is crucial for achieving the crisp bottom and airy interior associated with a professional-quality, perfect pizza crust.
Step 10: Bake the Crust
Bake the crust according to your pizza style preference. For par-baking, bake until just set before adding toppings. For a fully topped pizza, bake until the crust is golden brown and the edges are crisp.
Monitor closely to avoid overbaking, which can dry out the perfect pizza crust.
Kitchen Equipment Needed
- Large mixing bowl
- Measuring cups
- Measuring spoons
- Wooden spoon or dough whisk
- Clean work surface
- Baking sheet or pizza stone
- Parchment paper
Pro Tips for Best Results
After years of testing dough formulas in home kitchens, the most consistent, perfect pizza crust comes from proper fermentation and heat management. Always allow enough rising time for flavor development, even if you are short on time. Preheating your oven fully makes a dramatic difference. Avoid adding too much flour during kneading, as a slightly tacky dough produces a lighter, more tender, perfect pizza crust with better chew and oven spring.
Storage, Freezing, and Reheating
Unbaked dough for a perfect pizza crust can be refrigerated for several days in an airtight container. For longer storage, freeze tightly wrapped dough portions and thaw overnight in the refrigerator before use. Baked crust can be stored at room temperature briefly or refrigerated for later use. Reheat in a hot oven to restore crispness without drying out the crust.
Recipe Variations and Substitutions
This perfect pizza crust adapts easily to different preferences. Whole wheat flour can replace part of the all-purpose flour for added fiber. Gluten-free flour blends designed for yeast baking can work with adjusted hydration. Olive oil can be swapped for avocado oil, and honey can replace sugar for subtle sweetness. These options fit well into typical US home kitchens.
Frequently Asked Questions
Why is my pizza crust not crispy?
A lack of oven heat is the most common cause. Thorough preheating and using a pizza stone help create a crispy, perfect pizza crust.
Can I make a perfect pizza crust ahead of time?
Yes. The dough improves with slow refrigeration, enhancing flavor and texture.
How thick should pizza dough be?
Thickness depends on preference, but a thin center with a slightly thicker edge produces the most balanced, perfect pizza crust.
Can I freeze pizza dough?
Absolutely. Freeze after the first rise for best results and thaw slowly before shaping.
Why does my dough shrink back?
Shrinking indicates tight gluten. Allow the dough to rest longer before shaping.
Is olive oil necessary?
Olive oil improves tenderness and flavor. While optional, it contributes significantly to a perfect pizza crust.
Can I bake a pizza crust without toppings?
Yes. Par-baking is common and helps prevent sogginess when adding heavy toppings later.

perfect pizza crust
Course: DinnerCuisine: ItalianDifficulty: EasyServings
4
servingsPrep time
20
minutesCooking time
15
minutesCalories
520
kcalTotal time
35
minutesPerfect pizza crust delivers a crisp exterior with a soft, chewy interior ideal for any topping. This reliable method creates restaurant-quality results at home with simple ingredients and proven techniques.
Ingredients
All-purpose flour
Warm water
Active dry yeast
Granulated sugar
Salt
Olive oil
Directions
- In a large mixing bowl, combine warm water and granulated sugar. Sprinkle the yeast evenly over the surface. Let it rest undisturbed until the mixture becomes foamy. This confirms that the yeast is active and ready to build structure in your perfect pizza crust.
- If no foam appears, the yeast may have expired, or the water temperature may be incorrect. Start again for best results.
- Stir the salt and olive oil into the yeast mixture once it is fully activated. Mixing these ingredients now ensures even distribution and prevents salt from directly contacting the yeast before activation. This balance is key to a well-flavored, perfect pizza crust.
- Add the flour in stages, stirring with a wooden spoon or dough whisk. Continue mixing until a shaggy dough forms. Gradual incorporation prevents lumps and allows hydration to occur evenly, which improves gluten formation.
- Transfer the dough to a lightly floured surface. Knead using the heel of your hand, folding and rotating the dough. Continue kneading until the dough is smooth, elastic, and slightly tacky but not sticky.
- Proper kneading is essential for a perfect pizza crust with good stretch and chew. Under-kneading leads to tearing, while over-kneading can make the dough tough.
- Place the dough in a lightly oiled bowl and turn it to coat all sides. Cover with a clean kitchen towel or plastic wrap. Let it rise in a warm, draft-free area until doubled in size.
- This fermentation stage develops flavor and creates air pockets that give the perfect pizza crust its light interior.
- Gently punch down the risen dough to release excess gas. This step redistributes yeast and sugars, improving texture. Let the dough rest briefly before shaping to relax the gluten and make it easier to stretch.
- Step 7: Shape the Dough
- Transfer the dough to a floured surface. Press gently from the center outward, leaving a slightly thicker edge for the crust. Avoid rolling pins if possible, as they remove air bubbles that contribute to a light perfect pizza crust.
- Step 8: Final Proof
- Allow the shaped dough to rest for a short period before baking. This final proof improves oven spring and prevents shrinking during baking.
- Step 9: Preheat the Oven
- Preheat your oven thoroughly to a high temperature. A hot oven is crucial for achieving the crisp bottom and airy interior associated with a professional-quality perfect pizza crust.
- Step 10: Bake the Crust
- Bake the crust according to your pizza style preference. For par-baking, bake until just set before adding toppings. For a fully topped pizza, bake until the crust is golden brown and the edges are crisp.
- Monitor closely to avoid overbaking, which can dry out the perfect pizza crust.